A Guide to Installing a WeBoost Signal Booster in Your RV
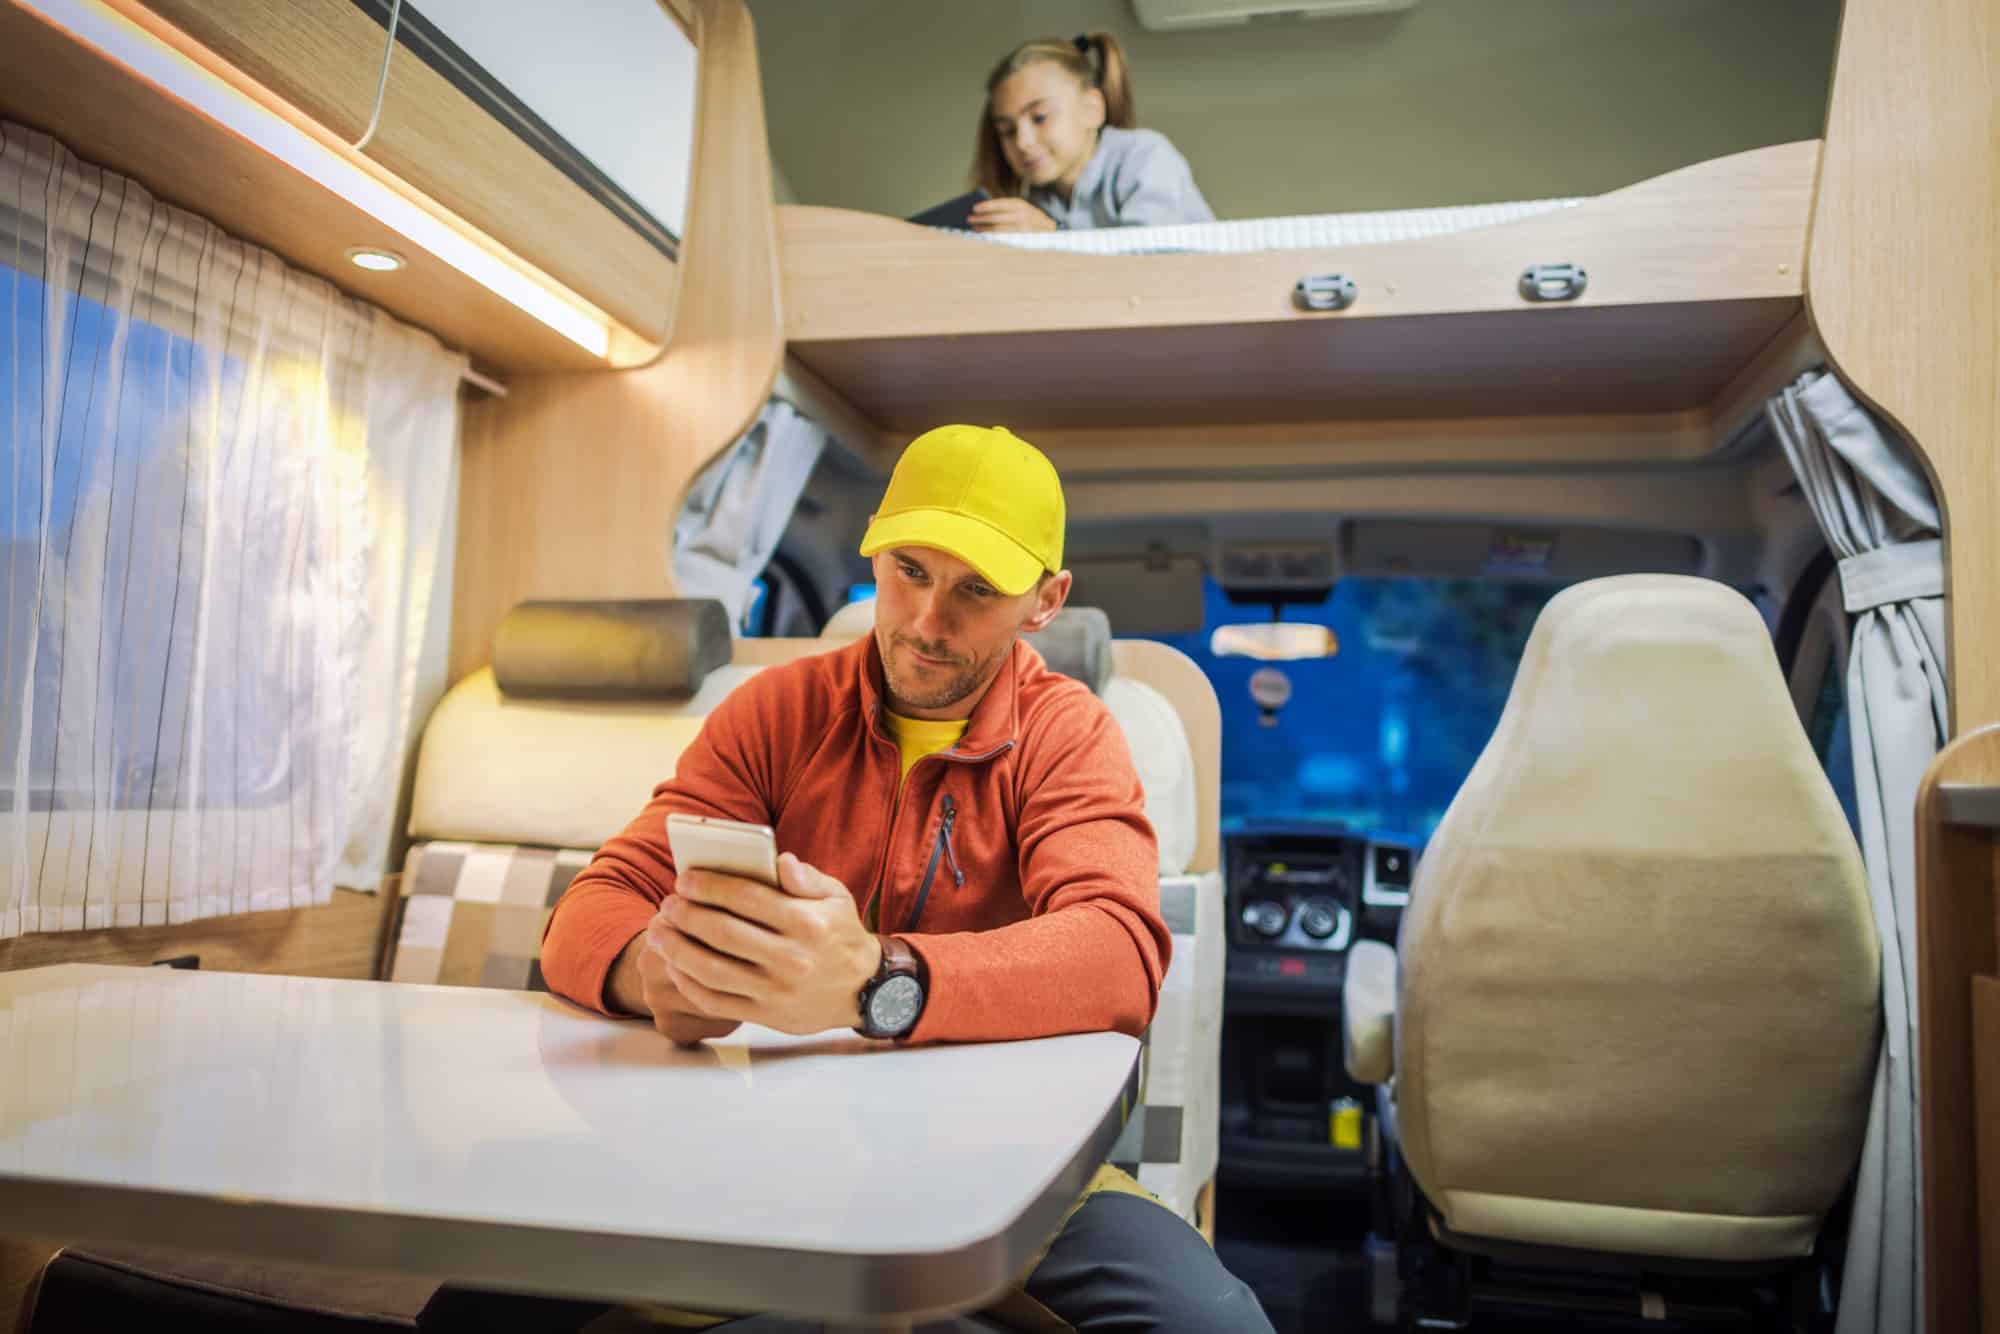
When traveling in an RV, getting a decent internet connection is always one of your biggest challenges. Wi-Fi is often slow and unreliable, if we can get it at all, and just doesn’t cover the sheer volume of streaming we do as a family. That’s especially true when we stay in rural areas, which is what we do most of the time.
That’s why we use the hotspots on our phones most of the time instead. You can subscribe to providers who offer internet service specifically designed for traveling, but it’s very expensive. It’s much easier to set up the RV and turn on our hotspots than it is to shell out the money for a specialized provider.
In the mountains and other remote areas, however, even cell signals can be weak and patchy. We needed something that helped us get stronger cell service in our RV, which translates to better internet for our nomadic family. That’s why we decided to give WeBoost a try.
About WeBoost
WeBoost offers quite a few signal booster kit options for homes, cars, and RVs. The idea is that you mount the receiver antenna as high up as you can to obtain a better cell signal. It then boosts that signal inside of your home or car, so you have better internet and more reliable calls and text messages.
These are great solutions for people who live in rural areas or for those who travel quite a bit and need a better signal along the way or at their destination.
Each device is tailored to your vehicle type, so once you narrow down your options to what’s meant for you, you may find that you only have a couple from which to choose. Because we’re talking about installing a booster in an RV, here are your options.
Drive X RV
The WeBoost Drive X RV booster doesn’t specify whether it’s meant for all classes of RV, but we use it in our Jayco Seismic toy hauler, and it gives us more of a signal than we’d have without it.
It’s designed to be used while you’re moving or stationary, and supports multiple users while being pretty far from a tower.
It’s the cheapest WeBoost option aimed at RVs, which is why we decided to give it a try first. We don’t use it while we’re moving, though: our RV barely makes clearances as it is, so we don’t want any extra height while we’re driving.
Drive Reach RV
The WeBoost Drive Reach RV is meant for all classes of RVs and can also be used while moving or stationary. It supports multiple users and works farther from a tower than the Drive X does.
That means you pay slightly more for it, but it’s really not that much more expensive, and you’ll likely have a better experience.
Destination RV
If you’re concerned about your signal and absolutely must have powerful reception wherever you go, the WeBoost Destination RV is the option you want. In hindsight, this is probably what we should have gotten, but we just couldn’t justify the cost at the time.
It works incredibly far from the tower, but it’s not meant to be used while moving. As the name suggests, you should only operate this antenna while you’re parked. It’s designed for multiple users in very large trailers.
Why We Choose WeBoost
There are some alternative signal boosters out there, but none of them got the reviews that WeBoost gear did, so that made us a bit more comfortable trying it out over the competition. For the money we spent on ours, we weren’t willing to take too much of a chance.
We stay places for a month or two before moving on, so are on the road quite a bit. We also only stay in RV parks that are off the beaten path. You won’t find us in the middle of the city: we’re typically out in the boonies somewhere, nowhere close to any amenities.
We chose the WeBoost Drive X RV because we knew we’d need a boost when we were stationary, but also because it does give us the option to receive a signal while we’re on the move if we really need it.
Delays and problems happen in the worst places sometimes, so when we absolutely have to get a signal and need a boost, we know we can mount the antenna and get one.
We also chose this option because it’s extremely easy to install. Once that was done, taking the antenna down before we start driving or mounting it again at our destination takes about a minute.
Our RV is 45 feet long, so we could have splurged on the Destination RV that’s meant for larger vehicles. We typically already have a decent signal with Verizon anyway, though, so we ended up not needing too much of a boost. The Drive X RV seems to work for us.
When you’re ordering, make sure that whatever you choose is compatible with your carrier. WeBoost products are compatible with all carriers, but competitors may not be.
Ordering and Shipping
We ordered our WeBoost booster kit from Amazon rather than the manufacturer. It was a bit cheaper at the time, and because we’re Prime members, we didn’t pay for shipping and it showed up fast. I can’t speak to your experience if you plan to order it from the company’s website.
If you’re budget conscious like we are, you might see why we were a bit hesitant to try it. It seemed a little gimmicky, but we had to do something about our internet problems, and this seemed the best place to start.
Arrival and Unboxing
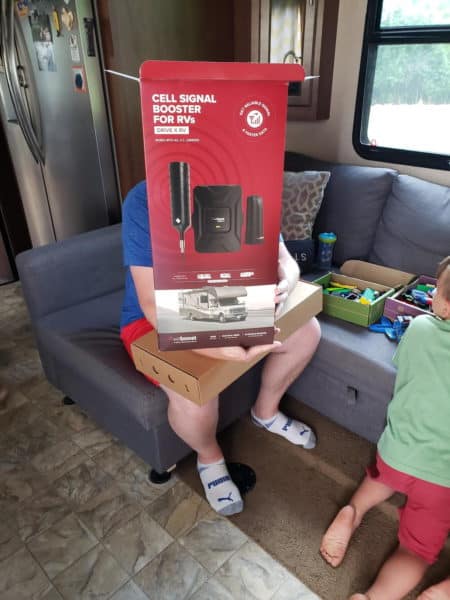
The kit came in a much larger box than I anticipated. There was a ton of packing inside to support the components, which was a good thing. It ensured that nothing was damaged in transport.
The box contained an outside antenna, a signal booster, and an inside antenna. The outside antenna is weather resistant and works all the time. We’ve had ours for almost a year now and it’s been through sleet, snow, rain, hail, and the Arizona summer sun with no visible damage to the device.
The outside antenna is wired to a signal booster that goes inside your RV. The signal booster is then wired to an inside antenna that distributes the boosted signal through the vehicle for your devices to pick up.
The box also came with all of the mounting hardware and wiring we needed. It even had a drill bit specifically for drilling through the exterior of your RV to feed the wiring through.
It contained instructions that were easy to follow and all parts were clearly marked. This was helpful, given that we really didn’t know what we were doing, despite all of the research we had done.
Installation
We began by determining where exactly we were going to install the components. There are restrictions to how far the components can be from one another to ensure the best performance, and you’re also limited by the length of wire contained in the box.
Luckily, we were able to mount the outside antenna at the rear of our RV and run enough wire to reach the booster in the kitchen. That distance is about 25 feet, so there should be enough length for most situations.
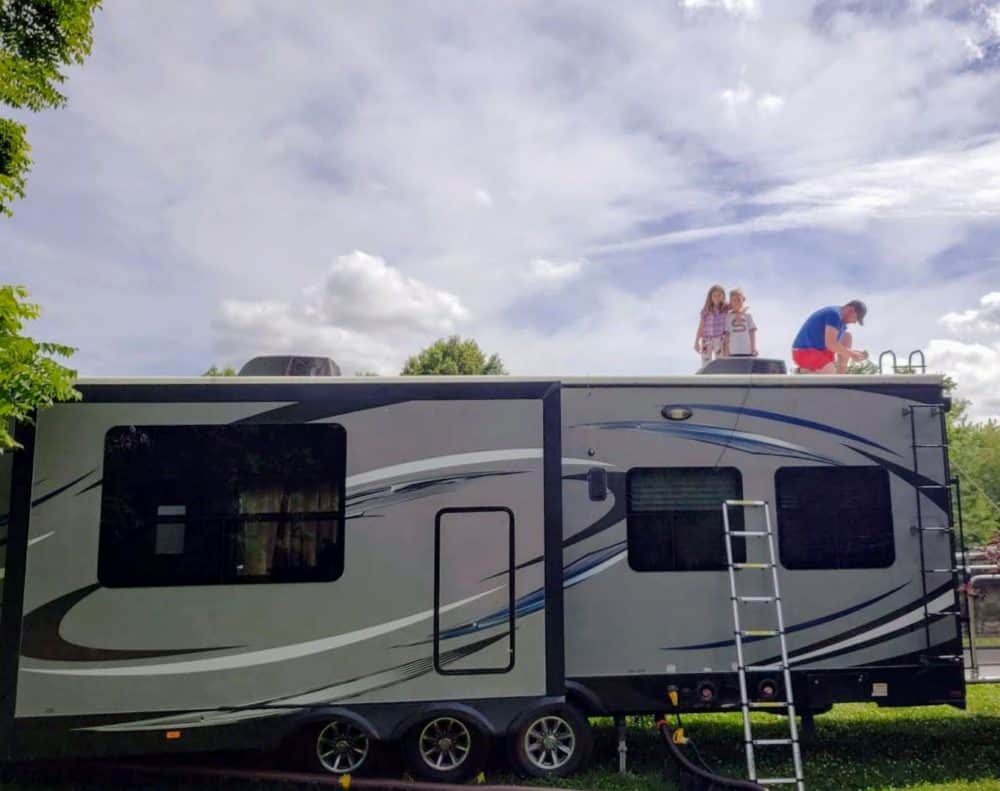
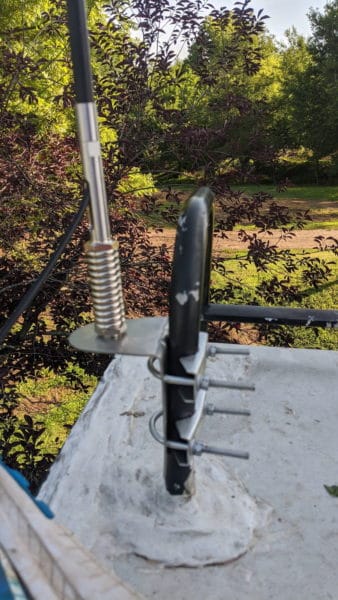
Mounting the Outside Antenna
Once we decided to mount the outside antenna at the rear of the RV, we got to work. We mounted it to the top of the ladder, so when it’s installed, it adds another foot or so to our height.
It only took about three minutes to mount it, because there was no drilling involved. We simply placed the bracket around the ladder and tightened it with the included screws. Then we situated the antenna into the bracket and secured it with the nut provided.
Running the Cables

After measuring, we knew we had enough wire to reach the kitchen. Time for a tricky decision: did we want to sneak the cable from the external antenna in through a vent, or drill a hole in the outside of our RV?
Understandably, we were very nervous about making holes in our RV! However, there really wasn’t another good way to get the cable inside, so that’s what we ended up doing.
Thanks to the drill bit included in the box, it was super easy to drill through the metal. The kit also comes with a cap, so after you run your cable through, you can tightly plug the hole to prevent leaks. So far, we haven’t had any.
The only tricky part was getting the hole we drilled in the exterior wall to line up with the hole we drilled in the interior wall in order to feed the cable through. We ended up having to drill two holes in the interior wall because the first hole we drilled didn’t line up at all.
Placing the Booster and Inside Antenna
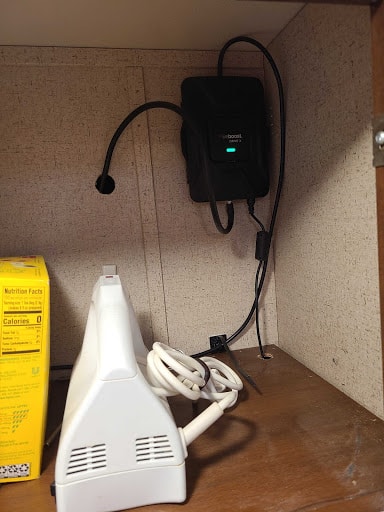
We chose to mount our booster inside a kitchen cabinet. I’m so thankful we did that, given that as mentioned above, we ended up with two holes in the internal wall. Once we connected the cables, we mounted the booster on top of the first hole. Since both holes are hidden inside the cabinet, no one will ever see them.
Our initial reasoning for mounting the booster inside a cabinet was so that it and the gobs of attached wires wouldn’t be an eyesore, but it definitely worked out for the best for multiple reasons.
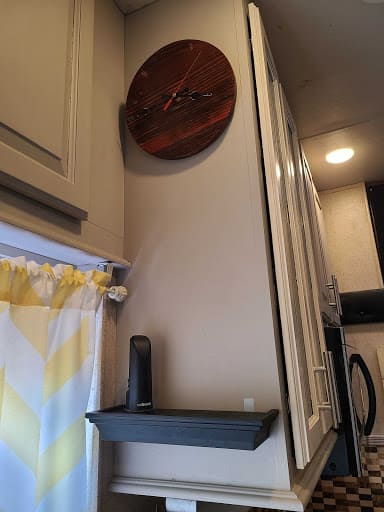
After that, all that was left was to feed the wire through the cabinet and connect the inside antenna, which now sits unobtrusively on a shelf in the kitchen.
Connecting
After all of the wires were connected, we simply plugged the booster into a power source and watched our signal immediately jump from two to four bars.
The most time-consuming part of the process was drilling holes and feeding the wire through. Overall, I’d say the entire installation took two hours from start to finish.
How Well the WeBoost Works For Us
Overall, our WeBoost signal booster works pretty well most of the time. We experience a stronger signal with it installed than we otherwise would. When we pack up and head to a new site, we simply unscrew the nut from the bottom of the antenna and take it down for travel. Once we arrive, we put it back up. It takes no more than a minute to do either.
For extremely remote areas, though, the Drive X RV model isn’t as powerful as we might have hoped. We were hoping that the external antenna would pick up a signal from farther away and be able to boost it better inside.
We also hoped the inside antenna’s range would be wider, but the reality is that it only boosts your signal up to about five feet. This isn’t a problem if our phones are near the antenna in the kitchen, but it doesn’t work as well in the bedroom.
That said, the Drive X RV is the cheapest, weakest option of the various models that WeBoost sells. I now think we should have gotten the most powerful solution (the WeBoost Destination RV) simply because of the size of our rig and the places we stay.
We rarely stay anywhere closer than about an hour from a major city, but the Drive X still gives us enough of a boost to do what we need to online most of the time. When it doesn’t, we find other alternatives like coffee shops, libraries, or other local businesses with free Wi-Fi.
If you have a small-medium RV and you typically stay no further than 30-45 minutes from a major metropolis, you’ll find that the Drive X RV is a great option. The more remote your campsite or the larger your RV, the more likely it is that you’ll want to invest in the more-powerful Drive Reach RV or Destination RV instead.
If you do choose one of the other models, your installation process will be very similar to ours. The primary differences will be the larger size of your hardware and the extended length of cable.
Main image via Shutterstock, other images via author