How To Bypass Facebook and Other Internet Censorship In Vietnam
Many countries around the world choose to block access to certain websites, and Vietnam is no exception.
Unlike China, which blocks websites via the “Great Firewall,” Vietnam often does so at the DNS level. Instead of truly preventing access to a site, some internet companies just remove it from their list of known domains. Facebook and Twitter are prime examples, but there are many others.
We’ve found these blocks to be quite inconsistent. You’ll likely have fewer problems in Saigon, for example, than the towns and cities further north. You might find that your hotel Wi-Fi isn’t restricted but the cafe down the road is, or vice versa.
If you do find yourself unable to load Facebook (or other popular sites) in Vietnam, though, there’s good news. Getting around this type of block is quite straightforward: simply change your DNS servers from the default ones supplied with your connection to public, global ones like Google DNS.
Below we show you exactly how to do that, whether you’re using a Mac or a PC, iOS or Android. It may not work in every case, but it’s consistently bypassed Facebook blocks in Vietnam for us over the years. Since it takes 30 seconds or less to find out, it’s worth giving it a go either way!
Changing DNS Servers on MacOS
Step One: Start by clicking on the Apple icon in the top-left hand corner of the screen, then select “System Preferences”. Once that’s open, click on “Network” and you should see the following screen.
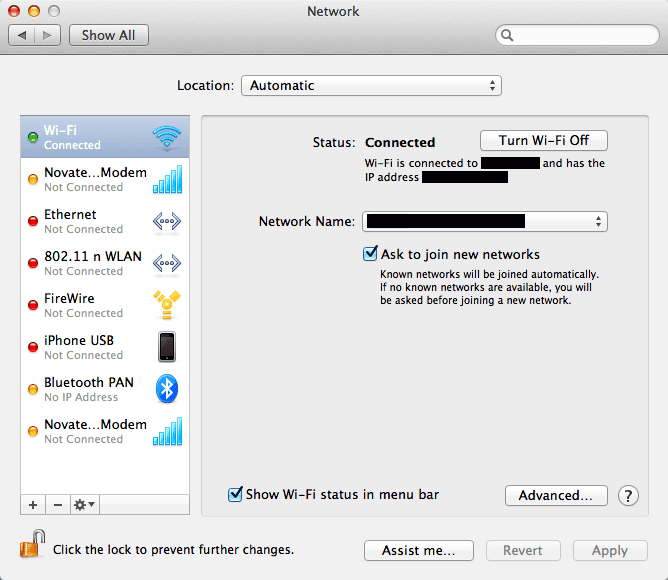
Step Two: Make sure the padlock in the bottom-left hand corner is unlocked and that you’re connected to a network. Select Wi-Fi from the menu on the left, then click on the “Advanced…” button. You should then see the following.
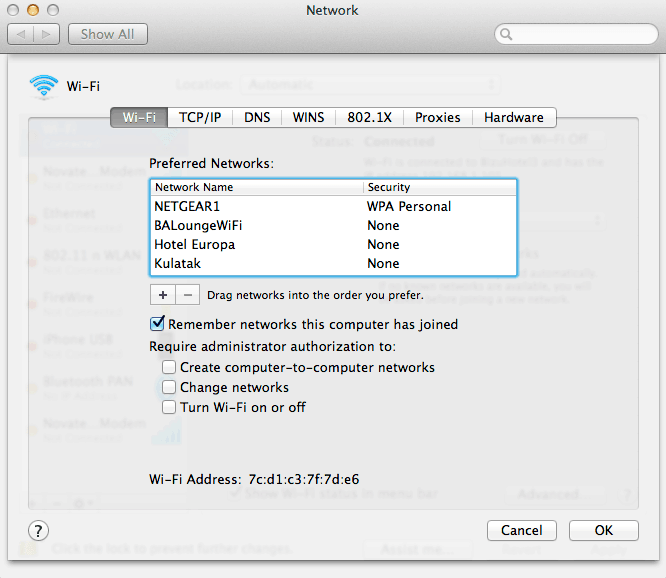
Step Three: Click on the DNS tab. In the “DNS Servers” column, click on the + button directly underneath.
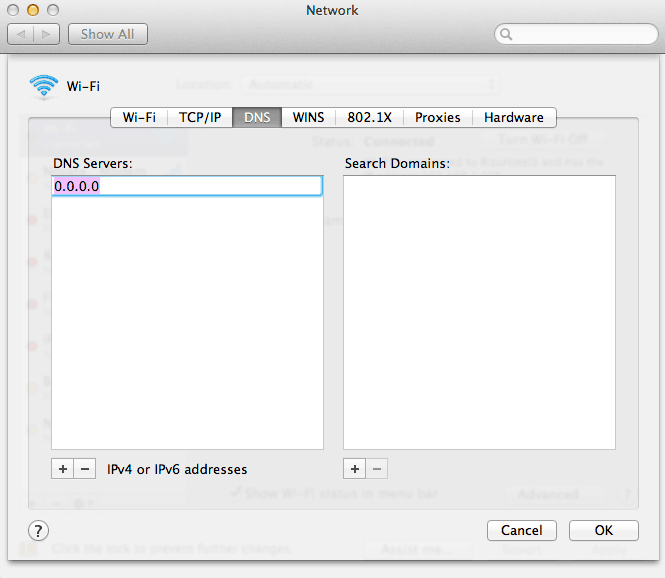
Step Four: Enter in 8.8.8.8 and 8.8.4.4.
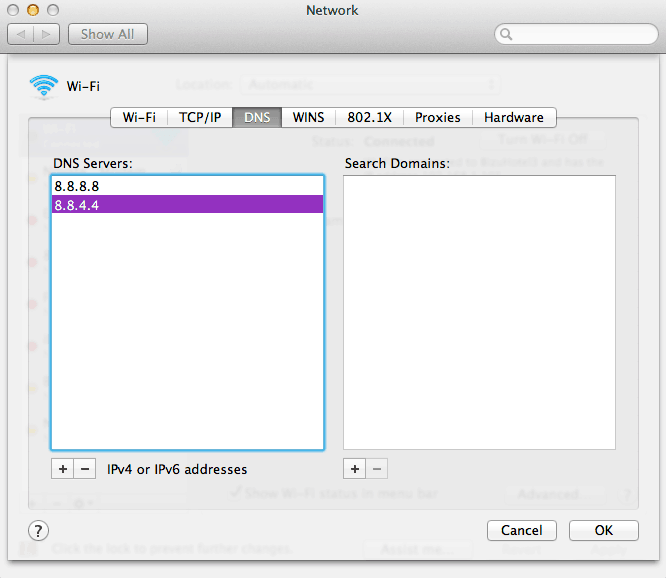
Step Five: Once that’s all finished press OK, click apply on the Network window, and you’re good to go.
Changing DNS Servers on Windows
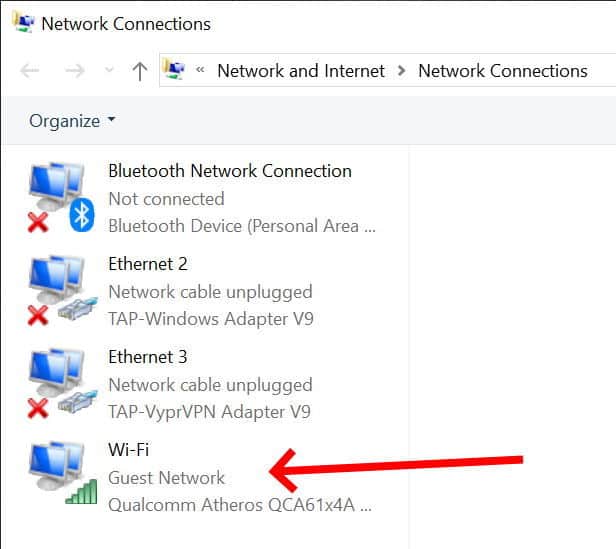
Step One: Click the Start button, type “view network connections,” and hit Enter. Look for the name of your network card (probably “Wi-Fi”), and double-click it.
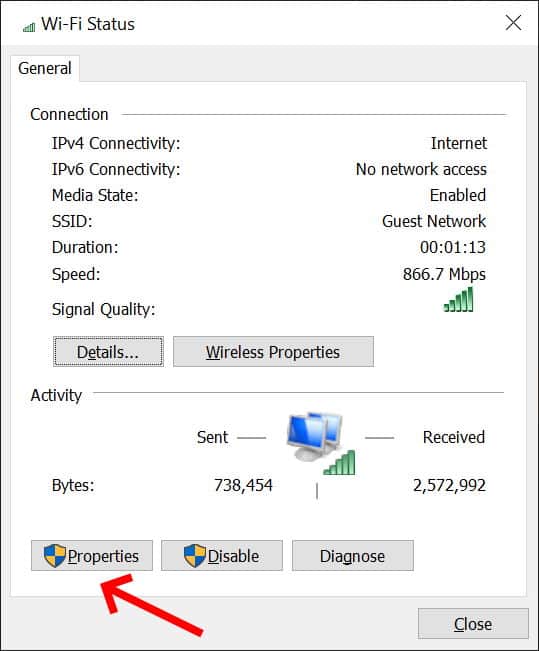
Step Two: Click on “Properties” as shown below.
Step Three: Next, select “Internet Protocol Version 4 (TCP/IPv4)” and then click “Properties”.

Step Four: Change “Obtain DNS server settings automatically” to “Use the following DNS server addresses” and fill in the addresses 8.8.8.8 and 8.8.4.4.
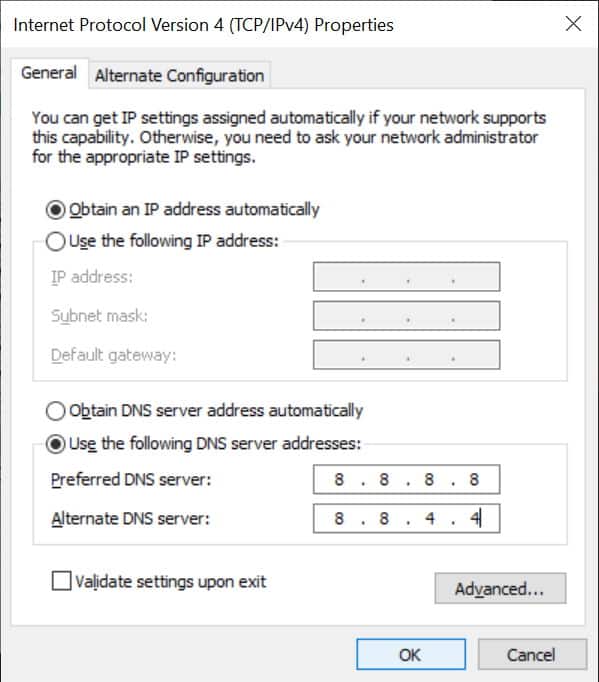
Step Five: Click OK several times to apply the settings.
Changing DNS Servers on iOS
On iOS, you’ll have to change your DNS setting for each network individually. Remember to do this every time you connect to a new Wi-Fi network.
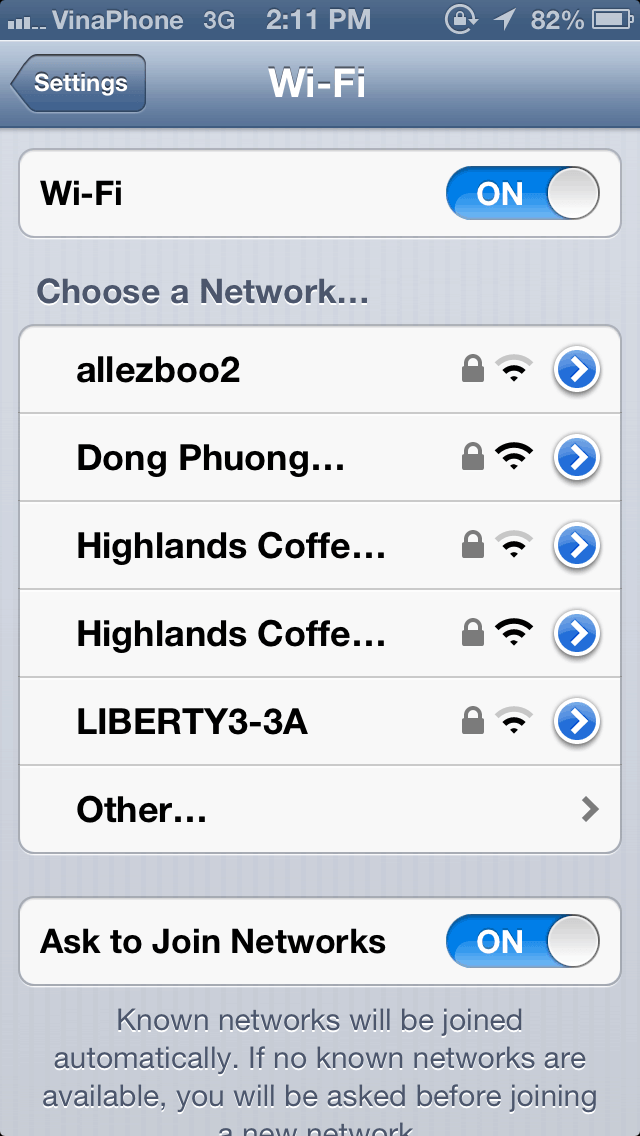
Step One: Bring up the Settings menu and click on Wi-Fi.

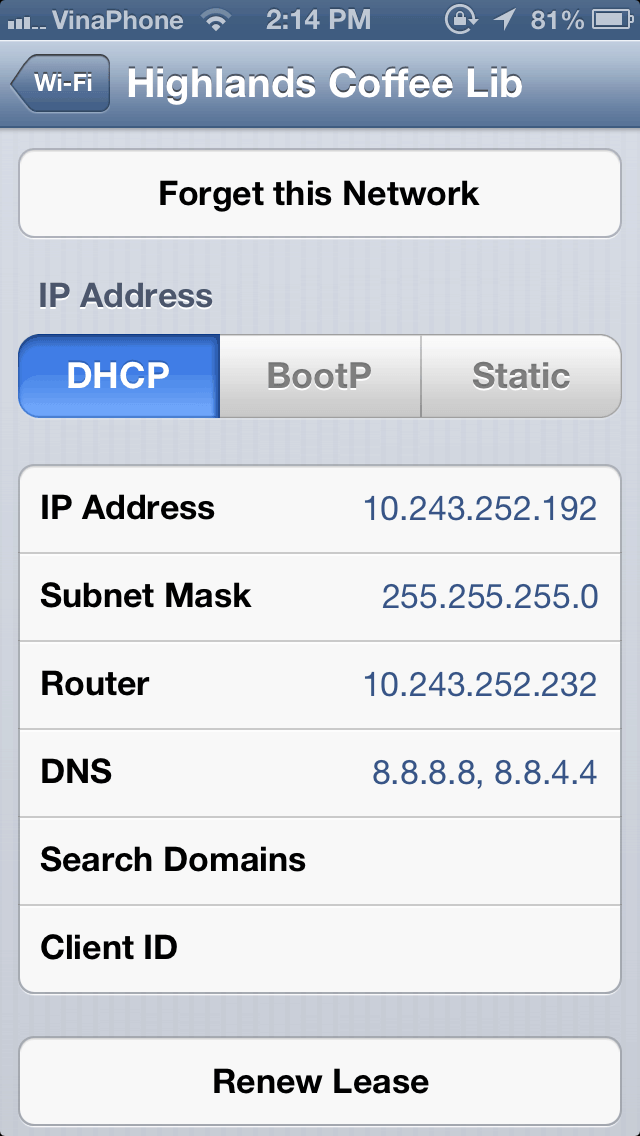
Step Two: Tap the blue arrow next to the wireless network you’re currently connected to.
Step Three: Tap on the DNS field and enter in 8.8.8.8, 8.8.4.4 using a comma to separate the two addresses.
Changing DNS Servers on Android
The process for changing your DNS settings on Android varies a little, depending on which version of Android you’re running.
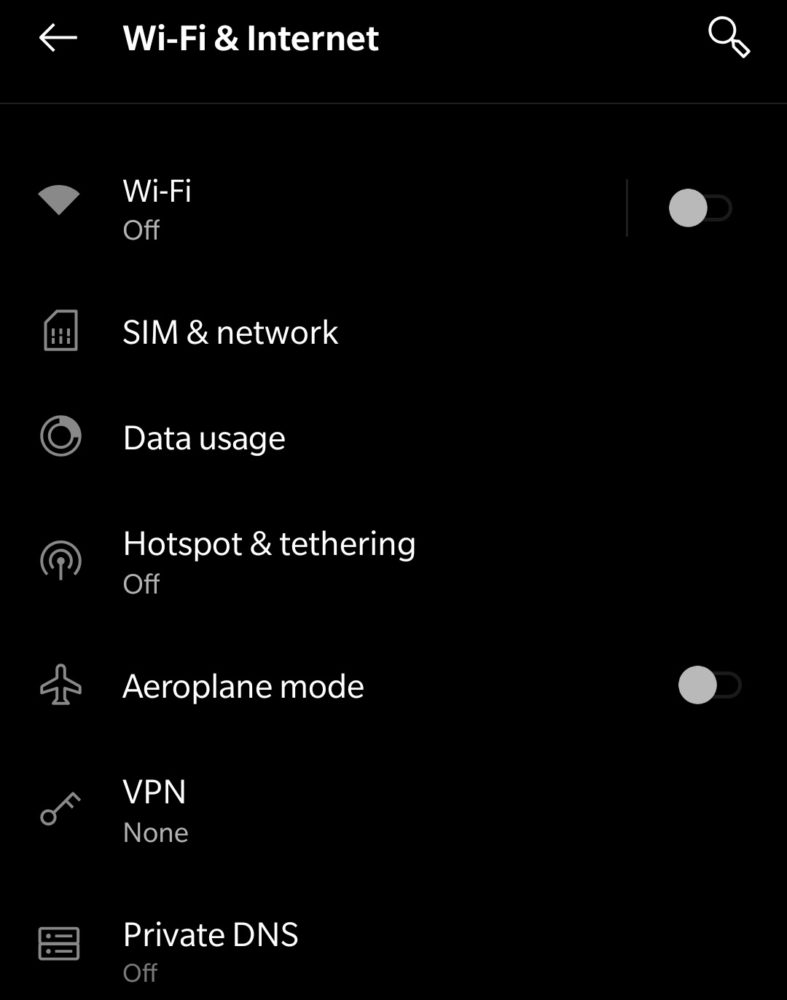
Google introduced a new “Private DNS” option in Android 9, which lets you set a default DNS server to be used for every Wi-Fi and cellular connection. To set it, go to Settings –> Wi-Fi and Internet, and then tap the “Private DNS” option at the bottom.
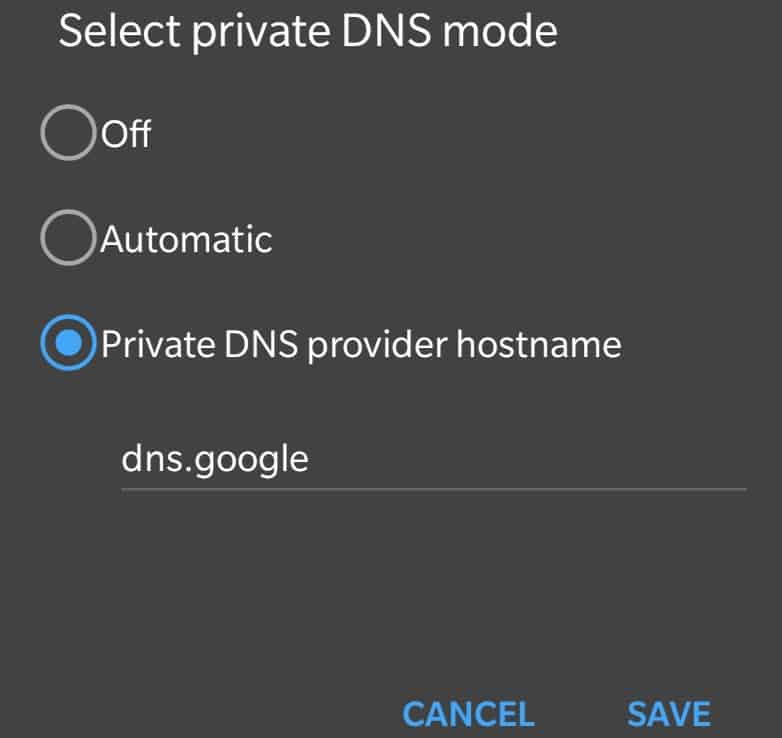
From there, choose “Private DNS provider hostname”, type dns.google, and hit save. That’s it!
If you’re running an older version of Android, you’ll need to set your DNS setting on each network individually. As with iOS, you’ll need to remember to do this every time you connect to a new Wi-Fi network.
There are a couple of ways to do this. The easiest is to use a free app like DNS Changer or dnspipe. These apps let you apply DNS settings for Google and other public providers with a couple of taps.
If you’d prefer to do it manually, here’s how.
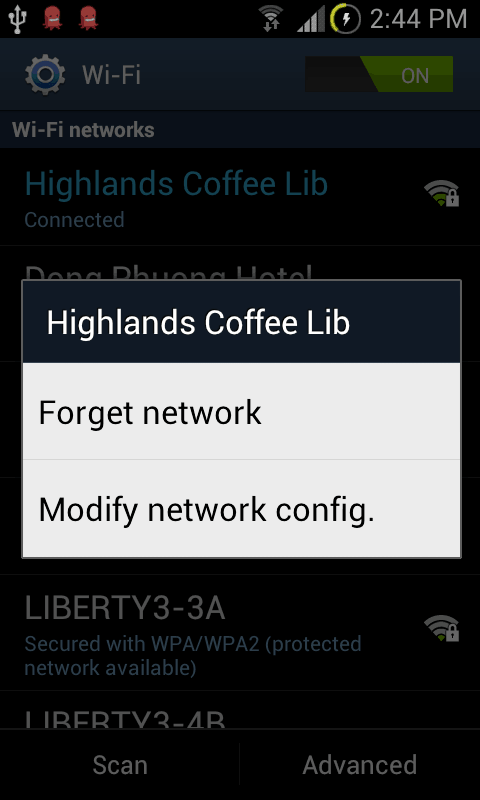
Step One: From the home screen, click on Settings and then Wi-Fi. Hold your finger down on your current Wi-Fi connection and select “Modify network config.”
Step Two: Scroll to the bottom of the screen and check the “Show advanced options” box.

Step Three: Scroll down to “IP settings” and change “DHCP” to “Static”. Scroll down to the boxes for “DNS 1” and “DNS 2”. Change them to “8.8.8.8” and “8.8.4.4”.

Step Four: Click Save
Get regular updates from the world of travel tech and remote work
News, reviews, recommendations and more, from here and around the web
Alternatives
If you don’t want to alter your DNS settings or this method isn’t working for you, then there are a few other ways to bypass the censorship.
The first of these is to use a VPN, which we recommend you use while travelling anyway. A VPN will encrypt your connection and provide you with a different IP address, making it seem as if you’re connecting from somewhere other than your actual location.
You could also use Tor, an encrypted network that lets you browse the internet anonymously. It works by re-routing your traffic through several other computers and networks, so nobody in the middle can identify the source or the destination.
Because Tor routes your data in a way that’s designed to be untraceable, your data takes a much longer route than usual. As a result, your connection will be noticeably slower when using it. As a result, you’re probably better off using a VPN unless you really need to be completely anonymous.
Images and screenshots via author


Beautiful. Clearly a post pointing straight at me here in Dalat, Vietnam. 😉
And LOL, yes, yes. While I’ve had little trouble accessing fb here in VN over the past two years, every so often the gubberment gets bored and…
Usually a proxy does the trick, but…
“…and fill in the addresses 8.8.8.8 and 8.8.4.4.”
LOL, coincidentally, recently I happened to bring my laptop into a wee kiosk computer shop here in VN for an unrelated dilemma, and when I mentioned the recent crackdown on fb, one of the techs grabbed my laptop and…
In 2 minutes, he swiftly entered precisely the 8.8.8.8 and 8.8.4.4. address you show above. Seriously. These Vietnamese youngsters are crackerjack hackers for sure! 😉
Amazing. And thanks for spreading the 8.8.8.8. word.
I’m in Da Lat now too and followed your advice. Brilliant! Thanks for putting this together.
Fuck me man! I was almost reinstalling the OS to try to sort that issue haha
Searched high and low. New software, cookies, terminal and what not.
Until I realized: what if it’s blocked in Vietnam, but only in some cities?
Bcuz before I was in Saigon and I was accessing just fine. So it didn’t occur to me first.
Then, I searched for that and bingo! So simple!
Thanks a bunch mate!
Awesome! It works like a charm :).
Lauren, Thank you! You just solved my 4 days pain without FB.
Wow! The only online instructions that have ever worked for me. Simple to follow. ..no computer ego speak. Thanks!
Yeh, kickass it worked!
I’m in Dong Nai just outside Saigon and couldn’t access Twitter on their Android app or via desktop.
Really Twitter? Cannot find Elon Musk… the zillionaire?!
Did the 8.8.4.4 thing and worked instantly. Take that commies 🙂
Thanx Lauren!
may 2016 , and using a macbook , i was not getting into facebook for the last couple of days on the server my hotel is using and your process worked a charm , thank you , being away from home facebook regrettably is my link to friends and family , you are a champion thank you thank you thank you 🙂