
Buying a SIM Card or eSIM in Chile
One of the narrowest countries in the world (just 150 miles at its widest point), Chile is also one of the longest, with huge diversity both in landscape and potential activities.
With opportunities to explore the deserts of the Atacama, trek the wilds of Patagonia, cycle through vineyards, or explore the beaches & street art of Valparaiso, there’s an outdoor activity for everyone.
Santiago is the place for those looking for a more urban experience, with glitzy malls, world-class dining, and easy access to the wine valleys and coast.
If you’re looking to stay connected, buying a local “chip” (SIM card) is easy and inexpensive. Good data speeds and decent coverage are available throughout a large part of the country.
On our most recent trip at the end of 2023, we decided to try out a travel eSIM instead. It was a lot less effort than finding and installing a physical SIM, and only a bit more expensive. We’ll keep buying them in the future for sure.
Companies
There are four network providers in Chile, Movistar, Claro, Entel, and WOM, plus a couple of resellers, Virgin and VTR Móvil.
Most travelers use Movistar, Claro, or Entel, with Movistar having the best coverage and Entel typically having the highest data speeds.
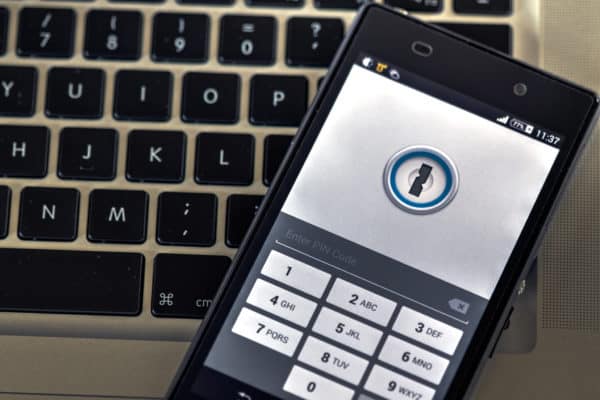
Travel eSIM for Chile
Given the high prices at the airport or the hassle of waiting until you get into town (especially if you’re not staying in Santiago), there’s a lot to be said for just buying a travel eSIM instead.
That’s the option we went with on our most recent visit, and it worked like a charm: we were connected well before getting off the plane.
Note that most travel eSIMs don’t come with a local phone number: that didn’t matter at all for us, since we used apps for communication, transport, and so on, but might for other people.
We used an eSIM from Airalo, as we were only in Chile for a few days on this trip and it had a useful short-term plan. If you’re staying longer than five days, though, go with Nomad instead. As well as better prices and more options, it’s good for another reason as well.
Need travel insurance for Chile?
Need travel insurance for Chile?
Airalo uses the Movistar network, and while that has the best coverage in the country, it can get overloaded and quite slow in some parts of Santiago. We had that problem in the Providencia neighborhood where we were staying, but it was fine at the airport and elsewhere in the city.
Nomad, on the other hand, can use both the Movistar and Entel networks. If you’re struggling or have no service with one, you can just switch to the other network instead. Best of both worlds and all that.
If you’re new to eSIMs, they offer big benefits to travelers in terms of how quickly, easily, and (often) cheaply you can get connected when you arrive in a new country. Most recent phones support them, and you can read all about them here.
How to Buy a Prepaid SIM Card in Chile
It’s easy to find places to buy prepaid SIM cards in Chile. They’re typically available in supermarkets, kiosks, and elsewhere, both in Santiago and other major towns and destinations throughout the country.
While you’ll likely pay more to buy at the airport, it is possible if you’re in a hurry to get connected. Claro & Movistar both have outlets at Santiago’s international airport, and SIMs are also available at a kiosk called Fotokina.
All are located in the departure area (top level) of the airport, just across from ticketing and check-in, and are easy to find.
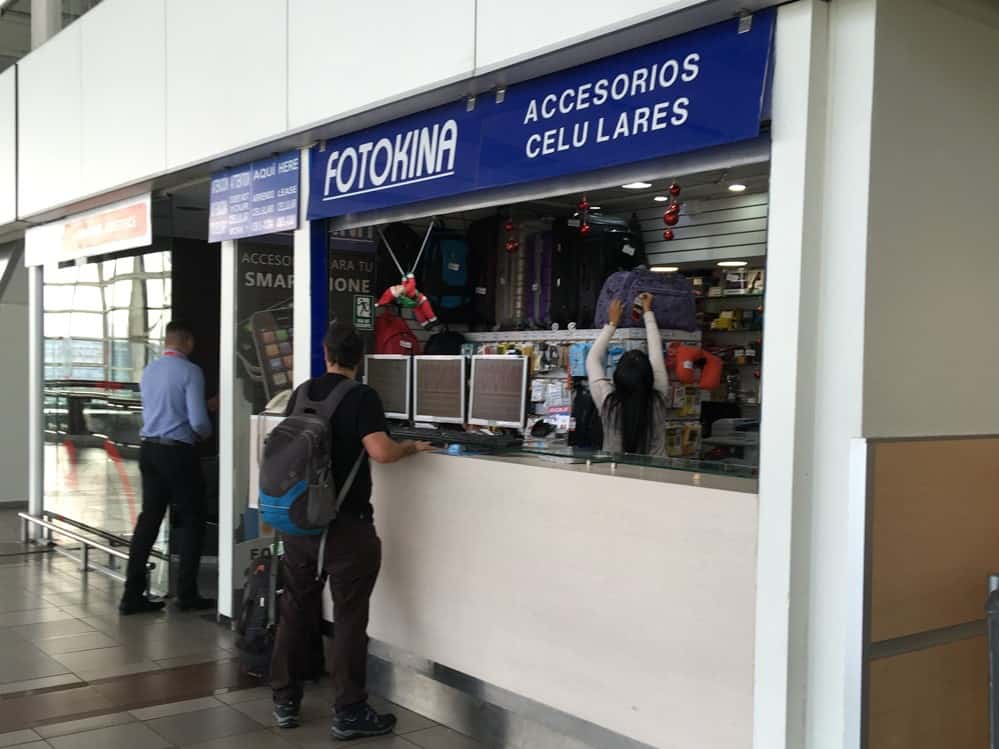
When we arrived around 10 am, the Movistar kiosk didn’t have anyone staffing it at the time, and Claro didn’t have any SIM cards for sale, a common problem at the airport. The staff directed us to Fotokina, a small kiosk which offered prepaid SIMs for both Movistar and Entel.
For the amount of data and length of time, Entel had the best price, so that’s who we went with. The process was super easy, simply selecting and paying for the package we wanted. The person at the kiosk installed the SIM cards in both of our phones, and activated them for us.
It took only a few minutes, and no passports were required.
Prepaid SIM and eSIM Costs
Entel
Fotokina offered a couple of different overpriced options. At the time, the Movistar package was 12,000 CLP ($14 USD) for 1 GB of data and 160 minutes, valid for 7 days.
The Entel version cost 22,000 CLP ($26 USD) for 3GB of data and 200 minutes, valid for 15 days. We went with Entel, as it was a better deal for the length of time we were staying in Chile.
Note that these prices are significantly higher than the official rates, so you’re definitely paying for convenience at the airport. The same Entel package purchased in the city would have cost 5,000 CLP (~$6), plus around 4,000 CLP for the SIM card itself.
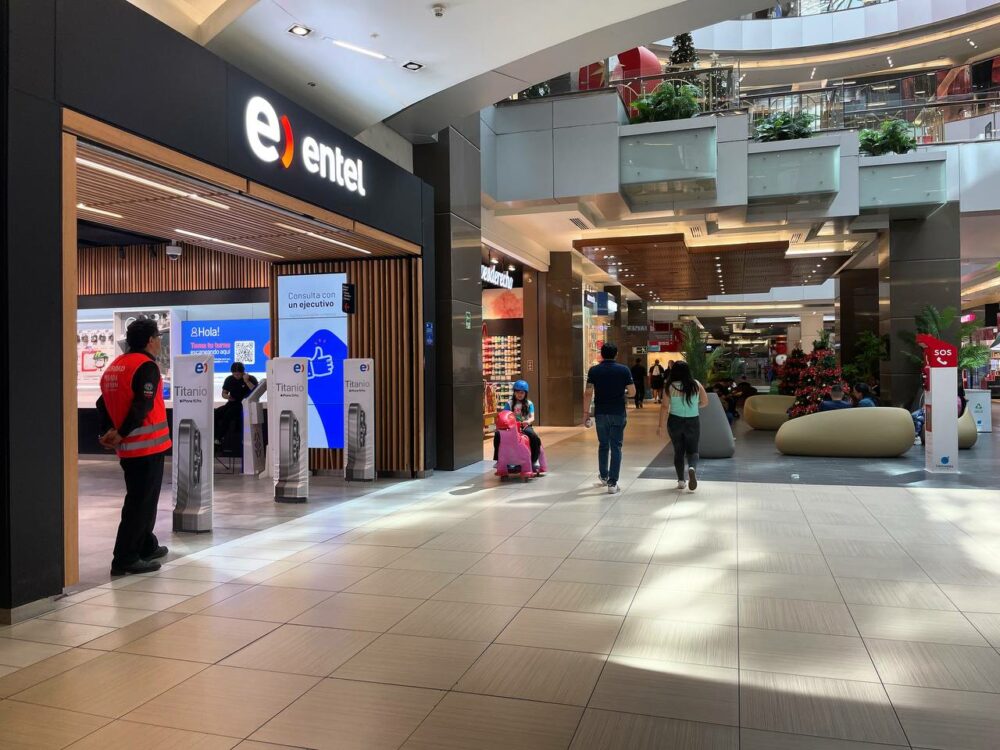

If you’re heading into Santiago and can wait to get connected until then, you’ll definitely save money by doing so. It’s easy enough to find somewhere to buy your SIM, but if you’d like to combine it with a bit of sightseeing, head to the Costanera Center.
That’s where we saw the counter and store in the above photos, and it’s always where you can go to the top of Gran Torre Santiago, the tallest building in Latin America!
These days, if you wait until you get into the city, that same 5,000 CLP gets you 10GB of data, plus 250 minutes of domestic calls, valid for a month. You’ll still need to pay for the SIM card on top, of course.
Nomad
Like I said, we used an eSIM from Airalo on our most recent trip, because it had a useful 7GB pack for $11. It only lasted five days, but that was fine, since we were only in Chile for that long anyway.
If you’re staying for longer, though, I’d recommend using Nomad instead. There are more options available, including several 30-day packs. They’re cheaper than buying physical SIMs from Fotokina at the airport, but more expensive than in the city.
We’ve compared many eSIM companies in the past, and here’s how the best ones stack up price-wise in Chile.
Registration
If you’ll be using your cell phone in Chile for more than 30 days with a Chilean SIM, you are required to register it as an anti-theft measure. Note that it doesn’t apply if you’re roaming (including using a travel eSIM), only when you’re using a local SIM.
Note: Due to COVID-19, this time limit was extended to 90 days for locals and 120 days for foreigners in early 2020.
Entel sent us a text message the day we bought our SIM card, directing us to register our phone within 30 days or the SIM would be blocked. They provided instructions and a link to the registration page.
To register your phone, you will need:
- A photo or scan of your passport.
- Proof of entry to the country (1 of the following):
- Copy of PDI tourist card you received on arrival
- passport with entry stamp, not older than 1 month
- round trip tickets or equivalent document issued by the transport company or travel agency.
- Proof of purchase abroad. A photo or scan of the invoice from the store where you purchased your phone.
- A photo of your physical phone, showing the IMEI number (located on or inside the housing of your phone).
- Photo of the screen of your phone displaying the IMEI (dial *#06# to display the 15 digit number).
- Completed and signed copy of the Application for Registration, which you can download from the website.
Yes, it’s painful.
Registration doesn’t have a fee associated with it if you do it yourself, and you can register one phone per year for free. Various companies can also help you register for a fee, usually around 15,000 CLP.
Thankfully we didn’t need to go through the process, as we stayed less than 30 days in Chile.
Topping Up
Entel
Topping up was easy, since you can do it just about anywhere from kiosks on the street that sell newspapers and magazines, to supermarkets, convenience stores, and even pharmacies.
All you need to do is say which carrier you’re using, your phone number, and the amount you want to recharge. They’ll apply the credit and you’ll receive a confirmation by text message.
Nomad
Topping up with Nomad (or any of the other travel eSIM companies) is done by logging into the website or app. You just select your Chile eSIM, hit the top-up button, and buy the same package again.
The top-up packs have exactly the same pricing and duration as the original eSIMs: there’s little difference between topping up your current eSIM and buying a new one, other than not having to activate it.
Get regular updates from the world of travel tech and remote work
News, reviews, recommendations and more, from here and around the web
Coverage and Data Speeds
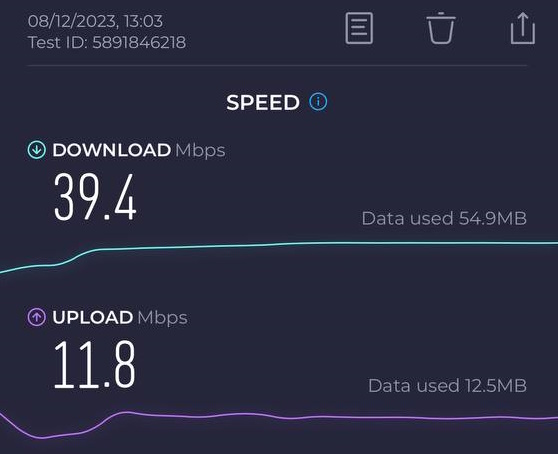
Coverage in the major cities was good, with mostly 4G/LTE service and fast data speeds. It did vary a bit depending on where we were in Santiago and Valparaiso, and which tower we were connecting to.
On day trips out into the valleys, vineyards, and mountains outside of Santiago, we still had good coverage overall (3G or 4G, with occasional dead spots from Santiago all the way to Valparaiso).
Cities further south in Patagonia still had good coverage and speeds, and even the bus route from Punta Arenas to Puerto Natales had decent coverage (3G/4G with occasional dead spots).
Coverage became spotty or non-existent in more remote areas, however. We had zero service while trekking in Torres del Paine or in the Atacama.
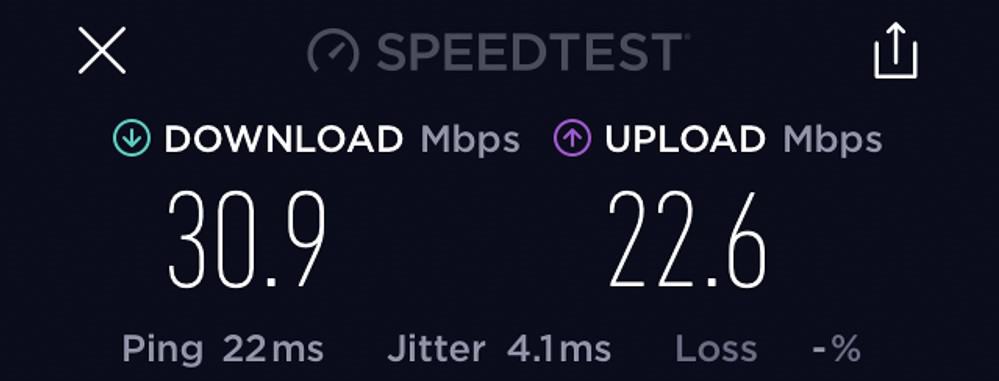
As I mentioned earlier, speeds with our Airalo eSIM were quite variable. They were more than acceptable at the airport (below), but often closer to 3G around where we were staying in the Providencia neighborhood.
Check out our guides to SIM cards and eSIMs in 70+ other countries here.


Hi,
May I ask if Fotokina accepts USD or they only accept Chilean Pesos?
Thanks for the detailed article, extremely helpful for my trip next week!
Hi Jolene! We only used Chilean Pesos while traveling in Chile, so I’m not sure if Fotokina also accepts USD. But the airport has quite a few ATM machines and a money exchange, so it would be easy to get Chilean pesos quickly if they didn’t accept your USD.
I would never recommend Fotokina to anybody. It is extremely overpriced. It’s better to wait until you get to the city to buy a chip. The Entel package from Fotokina is actually only worth $5.000 if you get it from the Entel store.
Only use Fotokina if you are desperate.
Hi Regan! I do agree that when traveling it is often a better deal to purchase SIM cards and services off the tourist path. But we were just transiting through the Santiago airport on our way south, and didn’t have time to go into the city. The airport does also have Movistar and Claro stores, but they didn’t have any prepaid SIM cards available. So Fotokina was our only option, and that’s why I shared that experience in the article.
Hey Kathy!
I was there late June 2019 and it was just like you described! Thanks for the details.
Future travelers: Fotokina is on the left side (facing the checkin counters), next to the line to do emigration on the second floor.
Thank you so much for this info. I live in Santiago and just use my wifi everywhere. I am traveling out of the city though and need to buy a SIM. Your article took all the stress out of that. Gracias!