Mobile Photo Editing with Snapseed: A Handy How To
Snapseed is without doubt my favourite photo editor on my mobile. There are a bunch of others that I use, but Snapseed is always the first I turn to. And, with its recently included HDR Scape mode (I do enjoy a bit of HDR), I thought it was time to do a tutorial on how to get the best out of this tool.
So here it is!
The Interface: the Basics
I’m largely using my phone in landscape mode for this tutorial because that happens to be the way images work best on this site.
Snapseed is fairly clever, and uses your screen real estate optimally depending on the orientation of your device. Nothing changes in terms of how you use it though.
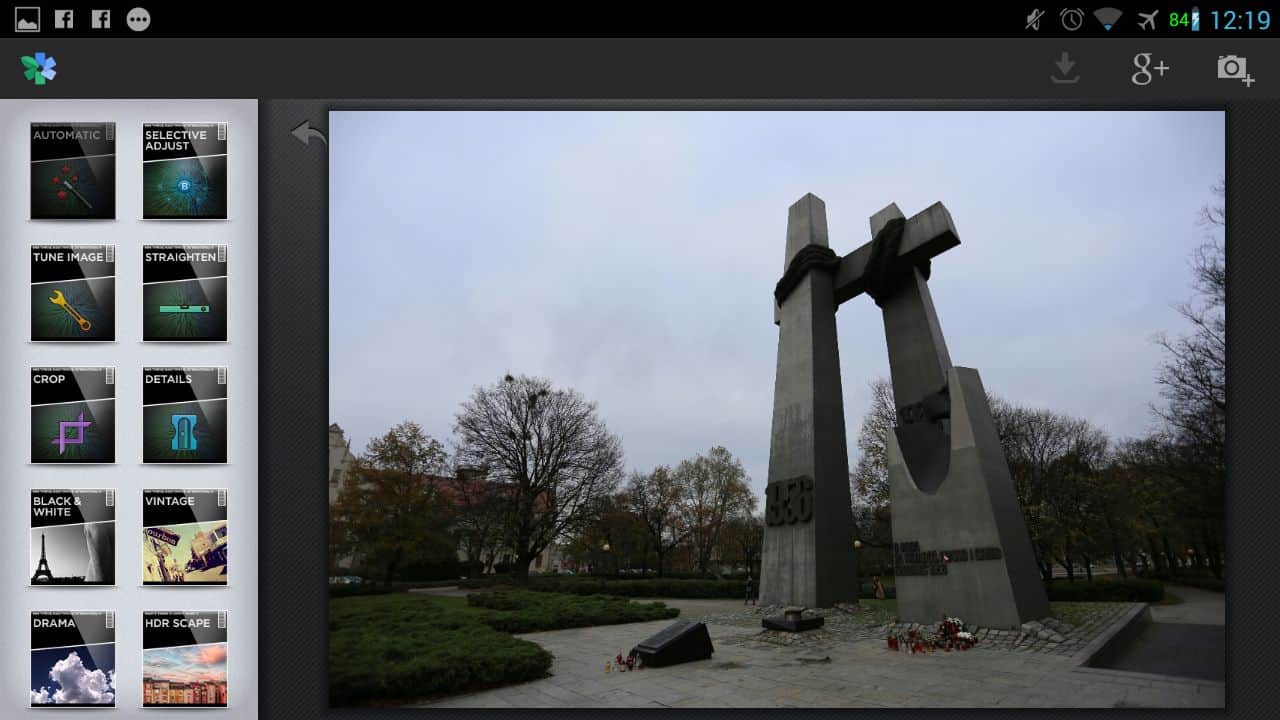
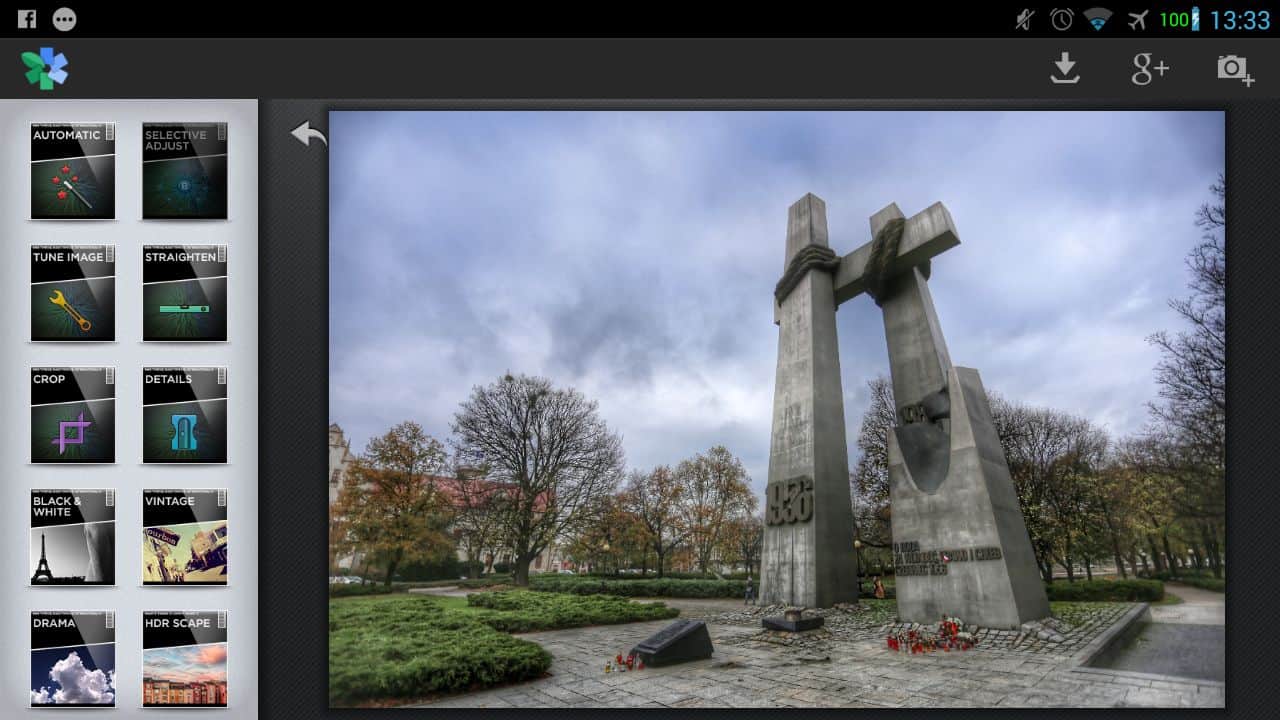
The Various Tools
There are a number of tools, or filters (I choose to call them tools, and will do so for the rest of the post) that Snapseed offers.
In landscape mode these can be found at the left hand side of the image, and in portrait mode (see picture) they are along the bottom.
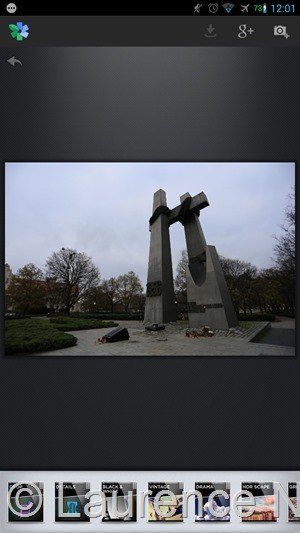
Some are fairly self-explanatory (black&white), others perhaps not so much.
Swipe up and down on the left of the screen to find additional modes in landscape orientation, and left to right at the bottom of the screen in portrait orientation. From now on I’m going to assume you are in landscape to make this tutorial easier to follow!
The Interface
The interface is amazing once you get used to it, but may differ from other apps you are used to, so a quick overview of how it works should help.
First – at any point, if you forget the basics, there is a built in help system to remind you what you are doing.
Let’s see what that looks like. First – pick the automatic mode by pressing the button labeled “automatic”. Easy so far!
The image moves to fullscreen for using the automatic tool:

At the top left of the screen, there’s a question mark. Press that.
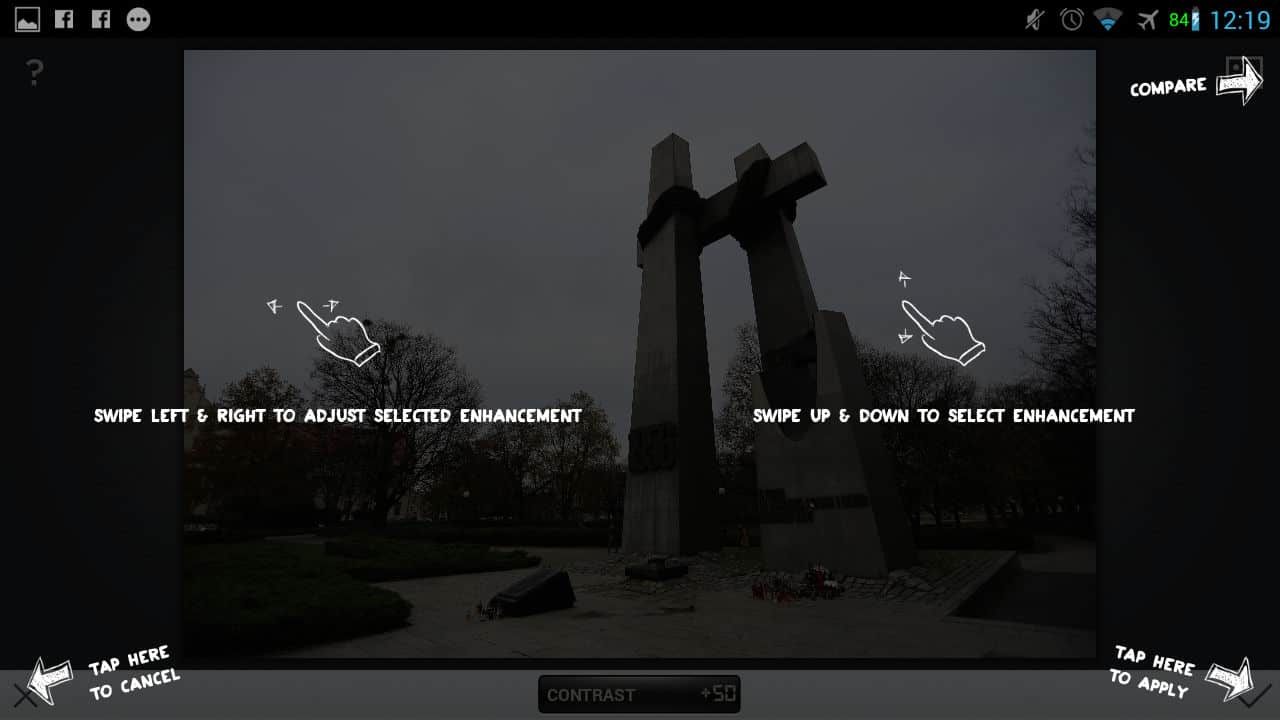
An overlay appears on the screen as shown above. This reminds you of the basic interface, which applies in every tool.
The interface is very simple. Moving your finger up and down on the image when you have picked a tool lets you choose a particular effect to apply. As you can see, In “automatic” mode, there are two effects to choose from: Contrast Correction and Color Correction.
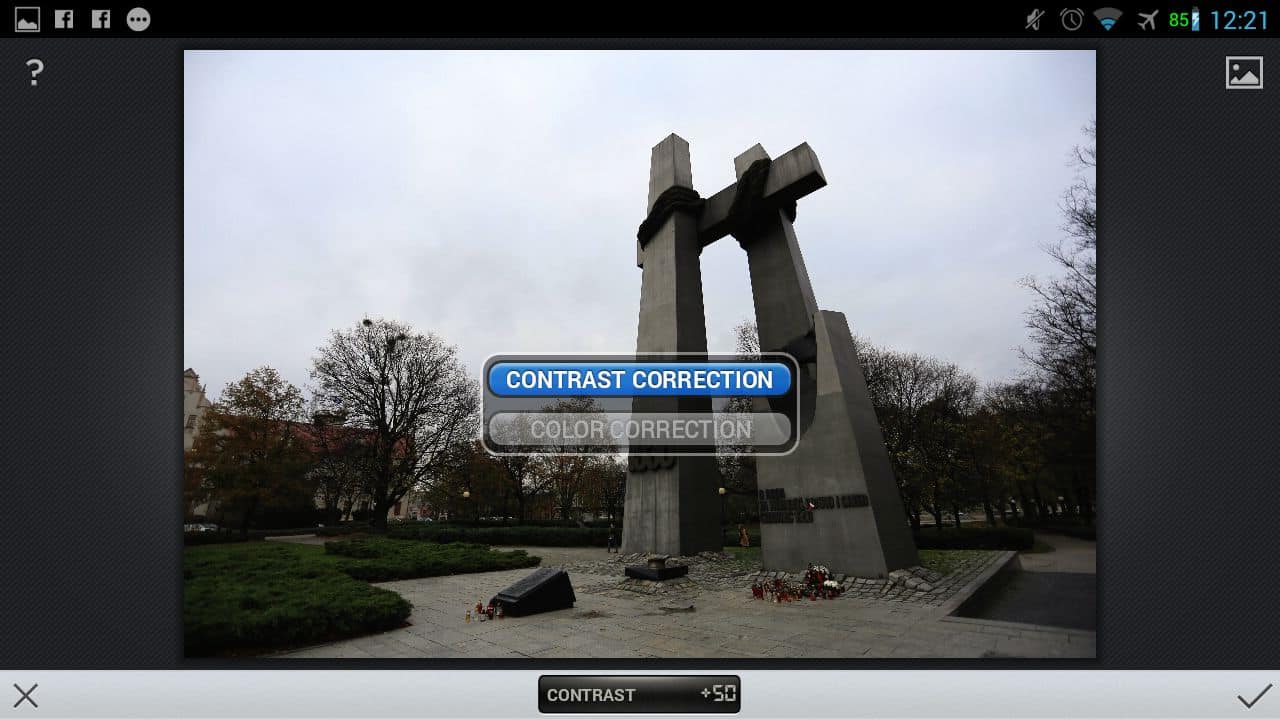
Move your finger so the effect you want is highlighted in blue, then take your finger off the screen.
Remember to keep your finger on the screen whilst you are selecting the option, otherwise the menu will disappear. This isn’t entirely intuitive at first, but you’ll get used to it quickly.
The black box at the bottom will have changed name to show which effect you have selected.
To change the amount of that effect, move your finger left and right on the screen.
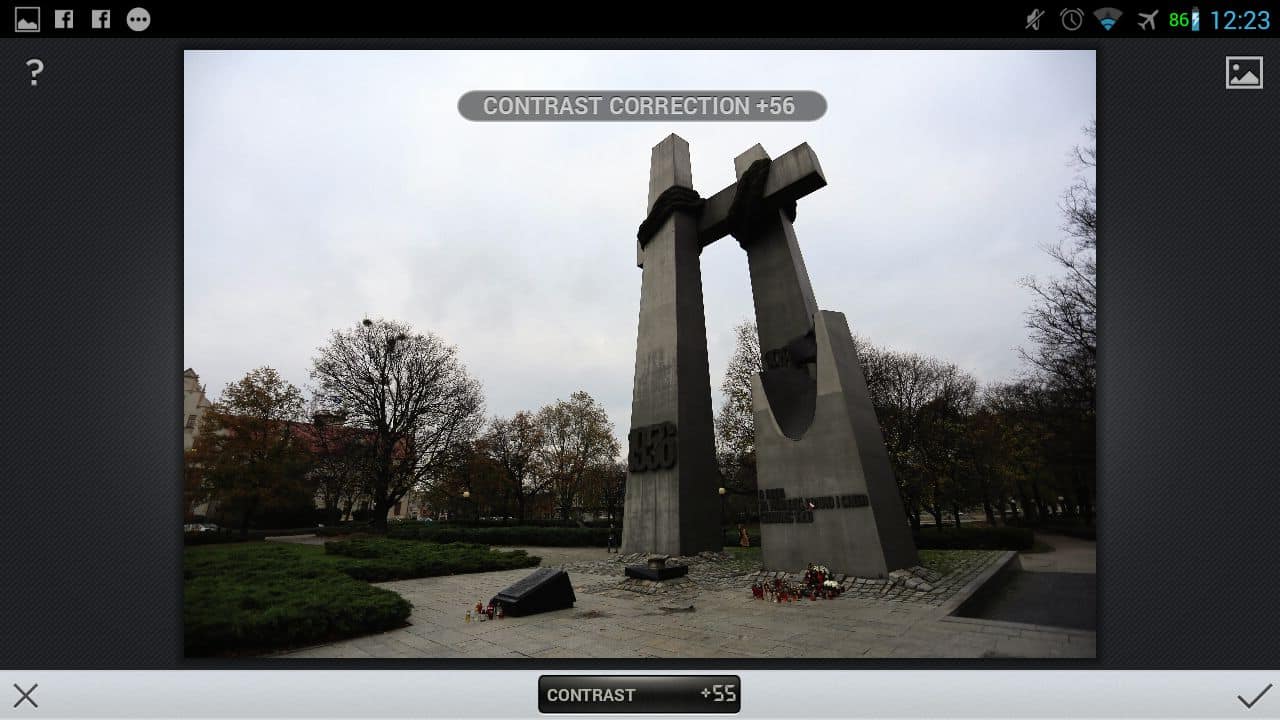
Right increases the amount of the effect, left decreases it. Easy huh?
At any point you can press the little image of a mountain at the top right, to compare your changes with the image you loaded into the tool.
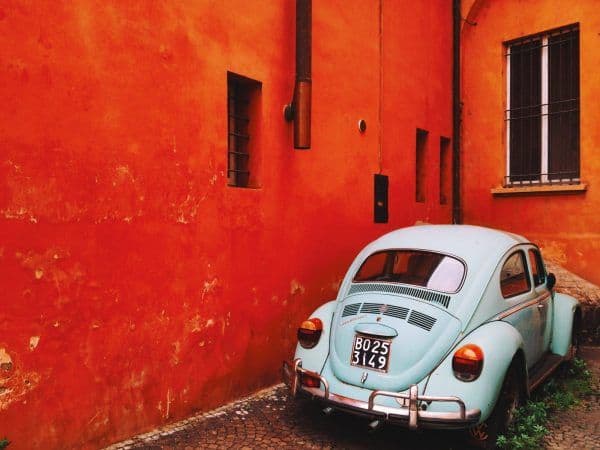
Let’s do some more advanced stuff, and make this picture look a bit more exciting.
Return to the main interface by choosing either the “X” at the bottom left to cancel any changes you made, or the little tick on the bottom right to approve and save any changes you’ve made.
The Interface: More Advanced Editing
Right then. Let’s load up the latest tool in the Snapseed arsenal, the HDR Scape tool.

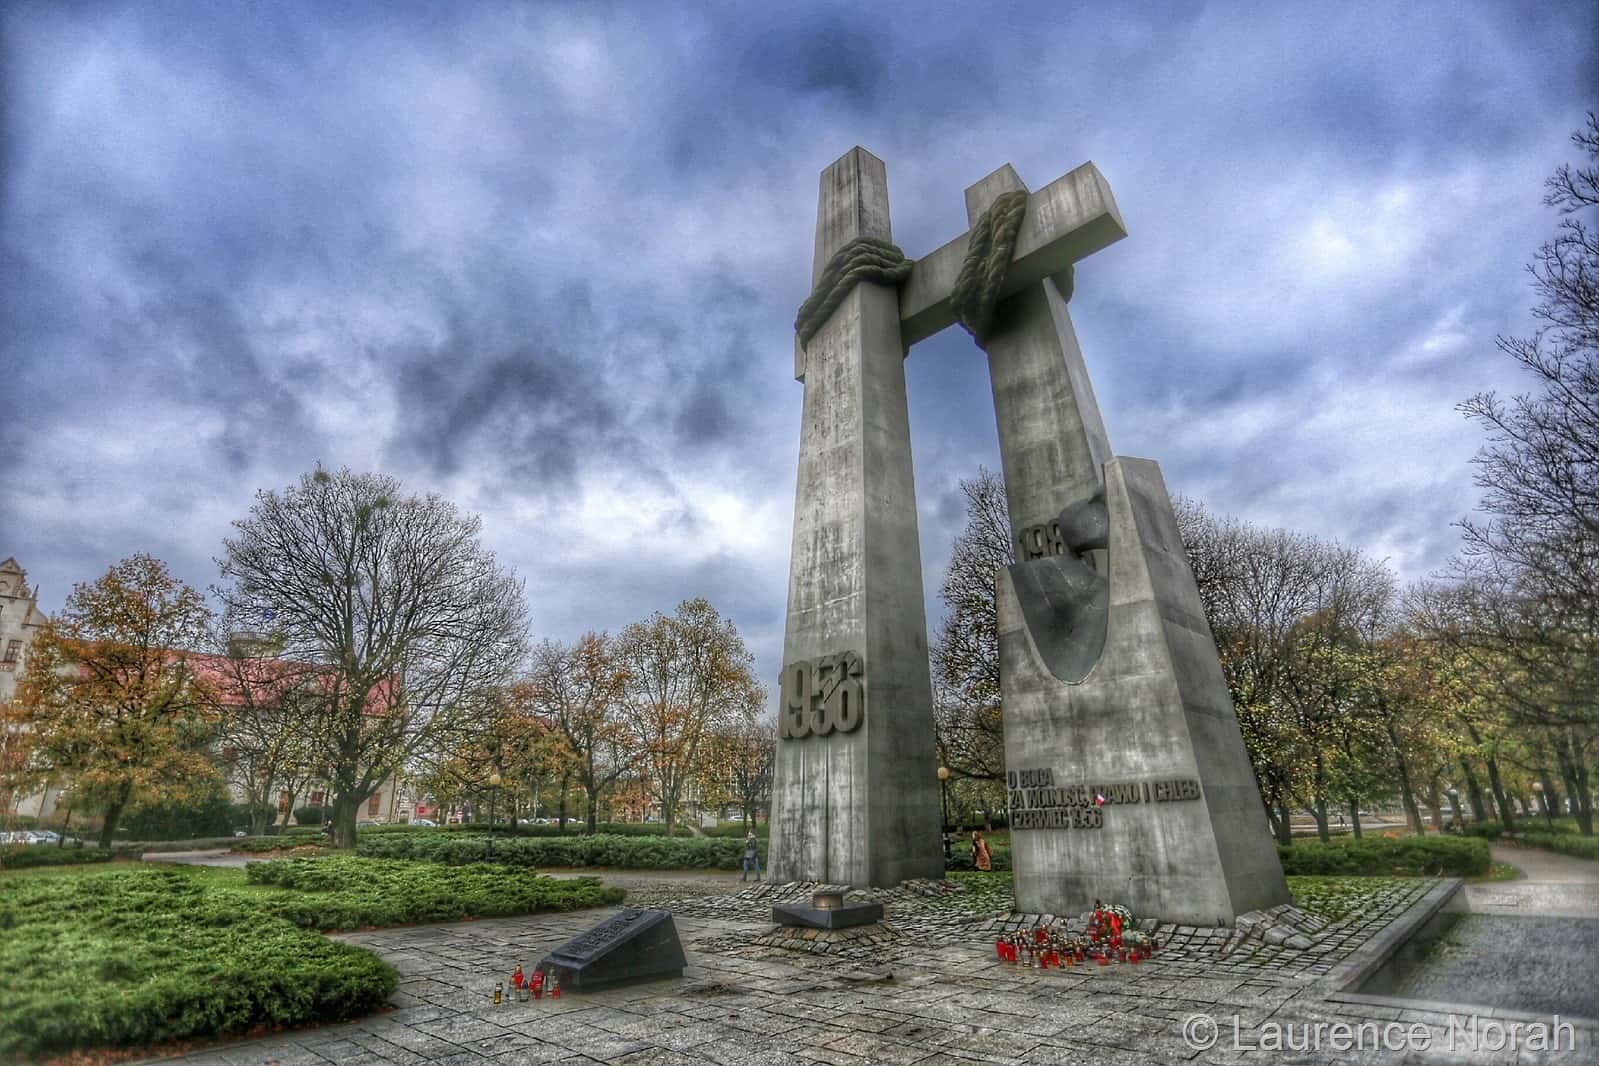
Ok. So we can see that this has made a slightly more dramatic change to our picture than the automatic tool!
Let’s look at a new part of the interface, which many of the more advanced tools come with.
The more astute of you will notice that there is now a little star icon down by the word “FILTER” at the bottom of the screen. If we press it, a new menu pops up, which looks like this:
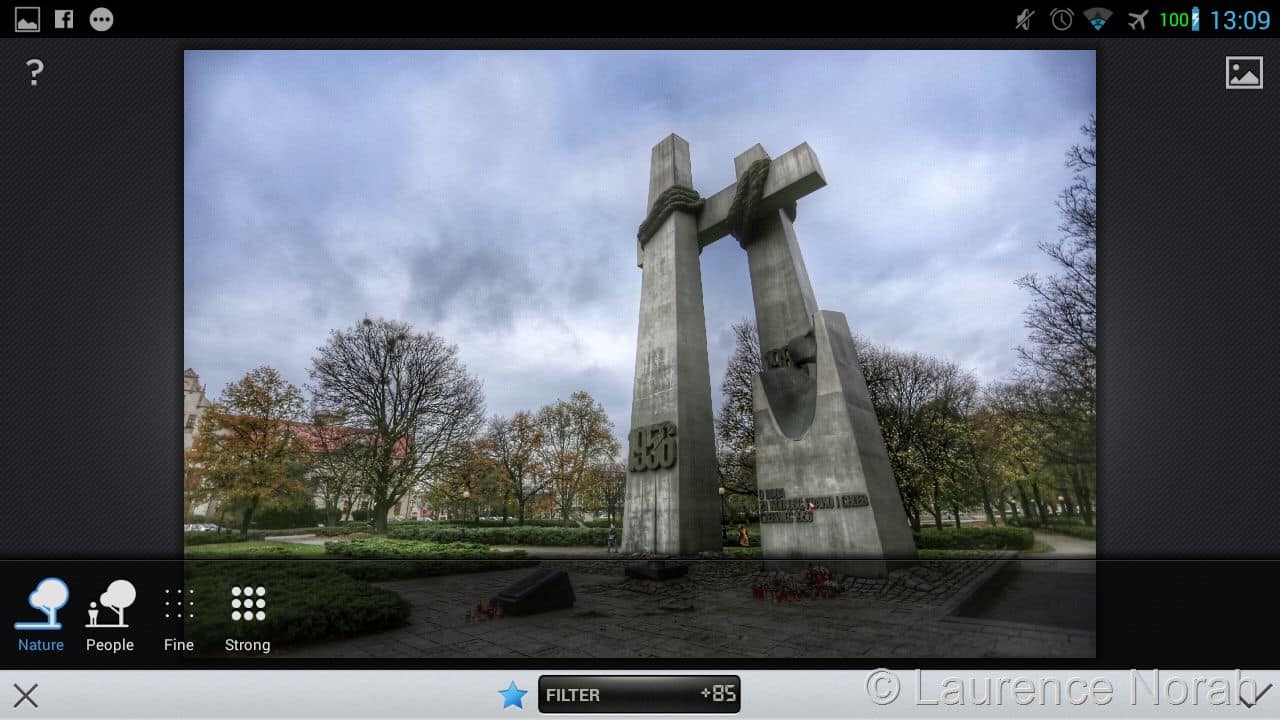
This allows you to set the parameters of how the tool works more specifically, and many of the advanced Snapseed tools have it.
These hugely extend the range of editing that can be done with Snapseed.
Pick the tool type you want (in the case of the image in question, nature is fine), and then either press the star key or move your finger anywhere on the screen to return to the main editing window.
Let’s bring up the tool options to see what we can do with the HDR Scape tool.
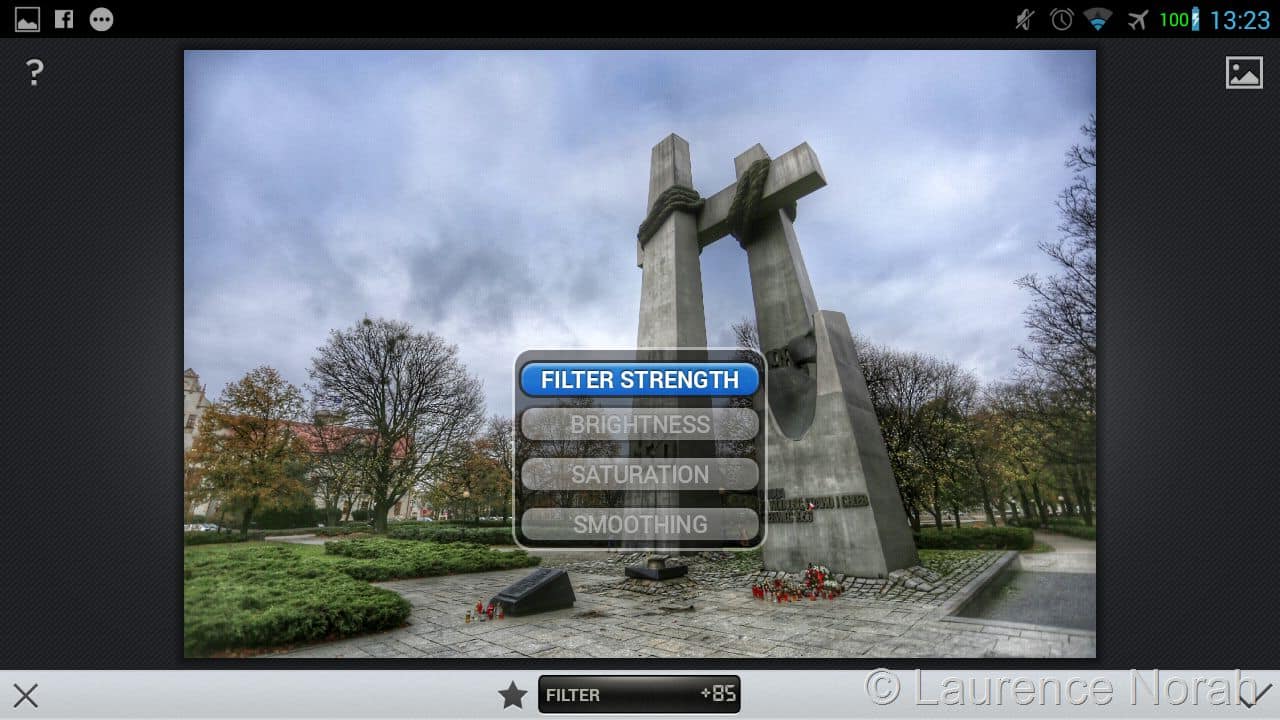
At time of writing, the HDR Scape tool comes with four options. The first, “Filter Strength”, sets quite how much of an effect we want the filter to have, from “not very much HDR at all”, to “lots of HDR please”, on a scale of 0 to 100. It defaults to 85, which isn’t too bad.
The other options allow you to tweak how the image looks, and should be fairly self explanatory. If not, just slide them around – the editor shows changes in real time, so you’ll have no problem seeing what it’s doing.
Don’t forget you can always compare your image with the pre-tool version from the picture icon at the top right.
Once you are happy with the overall look, you can press the tick to save your changes, or the X to revert them.
One thing to note is that there is no undo option after you have applied a particular tool. You can revert all the way back to the original version of the image, but not the steps in between.
One way to get around this is to save multiple versions of the image. From the main window, press the save button to backup your work to date (it’s a down arrow landing into a container, obviously. Each time you press save, a new version of the image will be saved to your phone.
The majority of the other tools in the Snapseed editor work as described above, and you can apply some very funky effects to images using them. There is, however, one tool which works a little bit differently, and when mastered, will give you even more control over your images!
Tweaking Parts of the Image
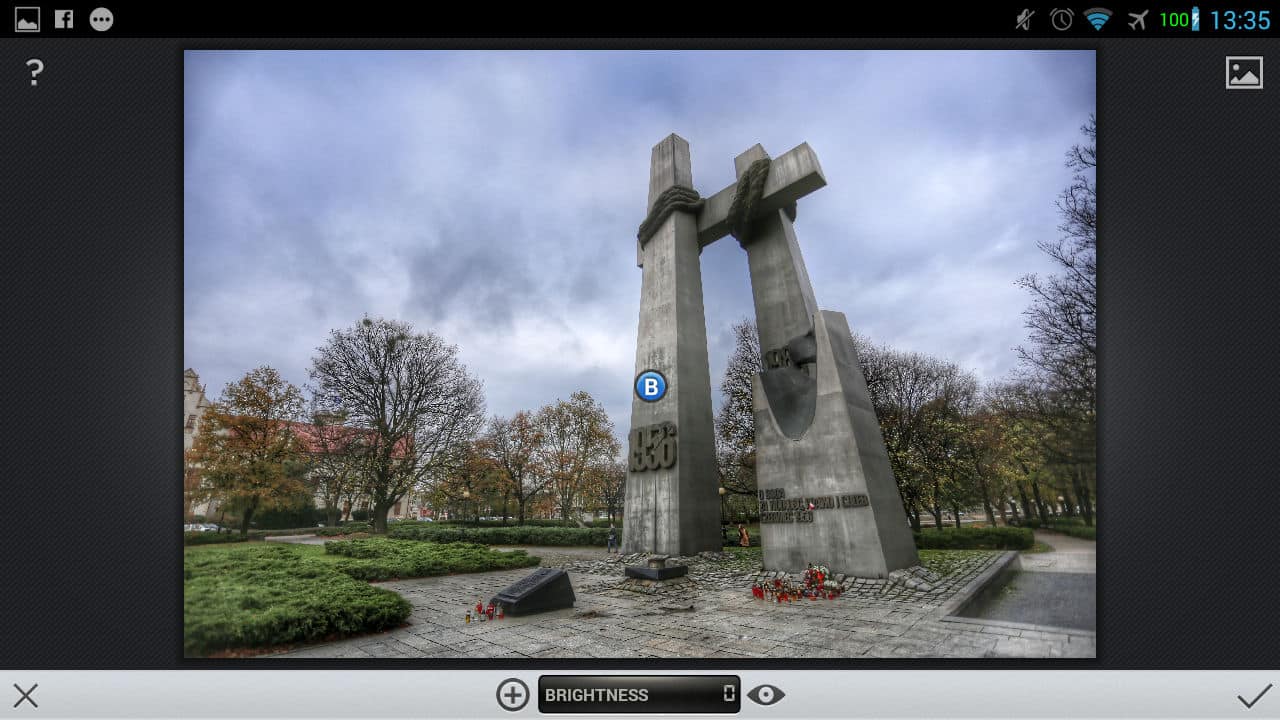
From the main window, load up the “selective adjust” tool.
You’ll get a window that looks like this.

Wait… a new icon! Instead of a star, you now have a little circle with a + in. This will allow you to edit component parts of your image. Let’s take a look at that in action.
Press the “circle with a + in it” button, and it will glow blue, as seen above.
Press an area on the screen where you would like to make some changes.
A button will appear with a letter in it.
You can move the button around to reposition the circle, and resize the circle by pinching and zooming with two fingers.
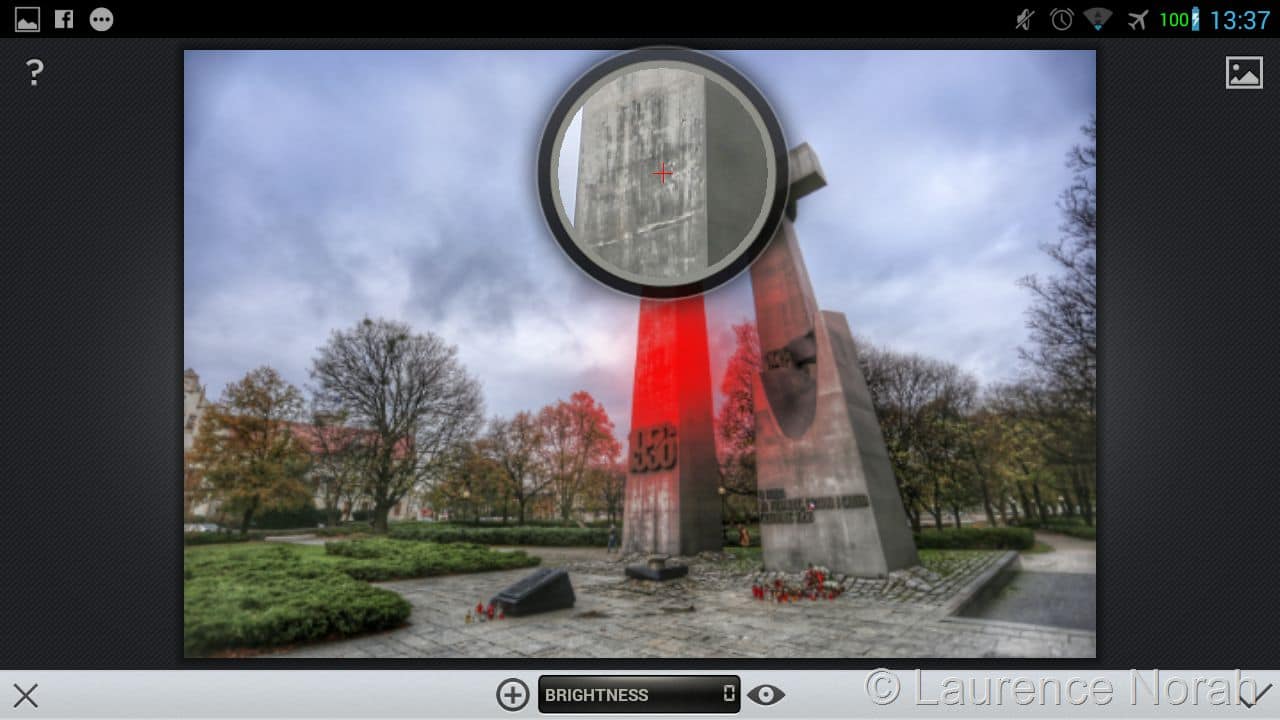
As you move the circle around, an area will be highlighted in red, which shows the area currently affected by the changes you are about to make. Let’s make those changes.
As per the normal interface, if you swipe up and down when your button is selected, you can choose between the tool options, in this case, brightness, contrast and saturation. You can edit these value for as large or as small a part of the image as you like, giving you tremendous control.
You can also add more control points, using the “circle with a plus in it” button. With multiple control points on the screen, just pick each one with your fingertip to choose which one you would like to work on.
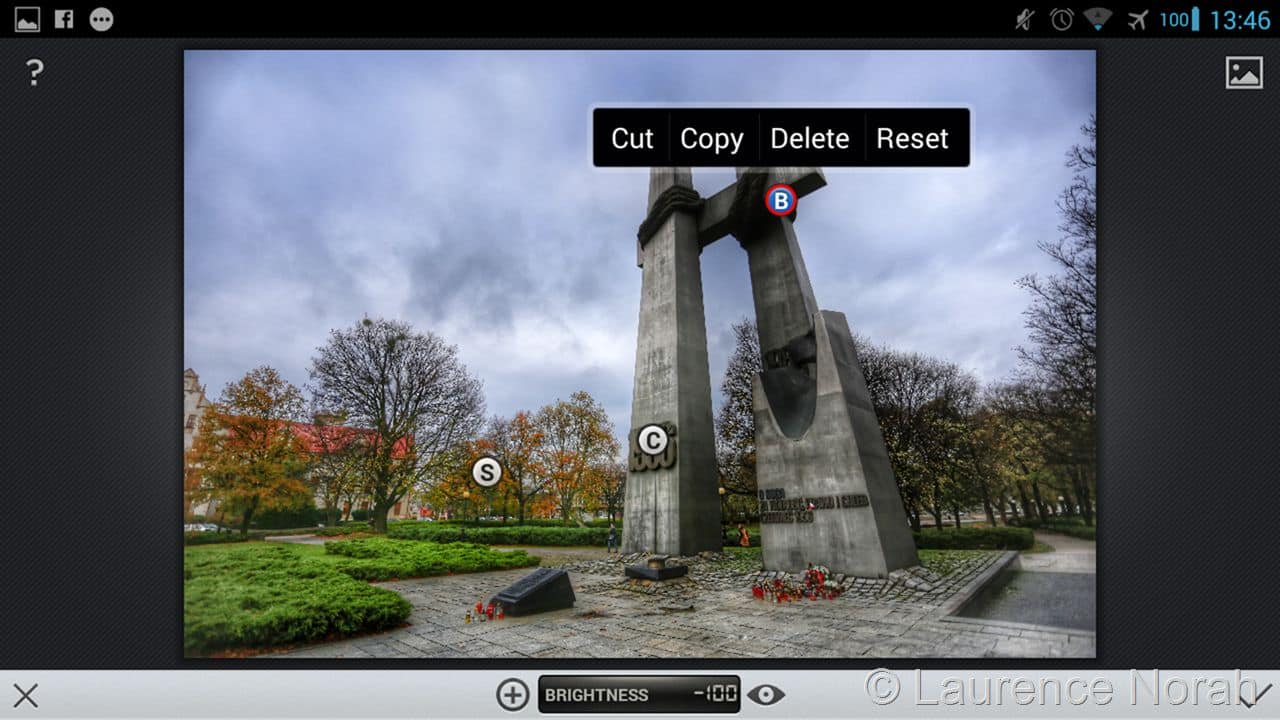
Tapping one that is already selected will bring up another menu, allowing you to perform various options on the button itself, including deleting it.
Get regular updates from the world of travel tech and remote work
News, reviews, recommendations and more, from here and around the web
Summary
So that’s pretty much it for Snapseed. As you can see, this tool lets you very quickly get the most from your photos.
That might entail a bit of sharpening (see the detail tool), turning up the grunge (see the grunge tool, which has the extra “texture option” that I thought I’d let you discover otherwise my word count is going to give the editor another headache), or just straightening and cropping.

Everything the mobile photographer could want in an editing platform, at the best possible price: entirely free! Grab it now on Google Play or iTunes, and have a go.