Our Jackery Explorer 1000 Portable Power Station and SolarSaga 100W Solar Panels Review
As international travel slowed over 2020-2021, interest in camping and outdoor adventures increased. Over the past year, we’ve written a lot more about camping gadgets, campervan tech, and outdoor gear for those looking for alternatives to global travel and a reason to spend more time outside.
Powering all your gear and gadgets for days at a time isn’t easy when you’re off-grid, though, which is why high-capacity portable generators have become increasingly popular.
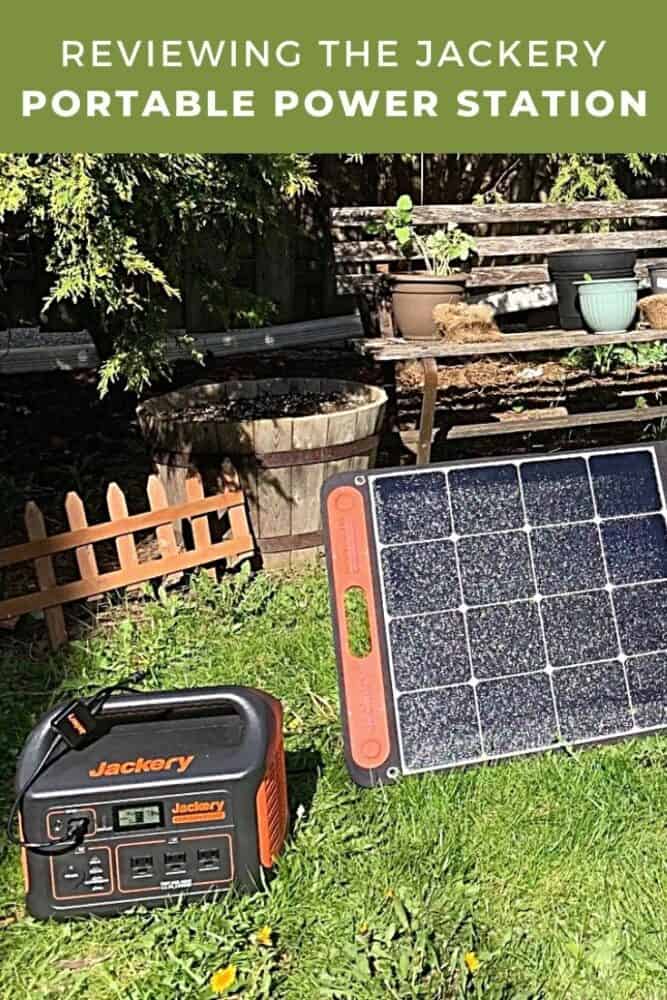
Jackery is one of the most well-known manufacturers of this sort of gear, and the company recently sent us one of its Explorer 1000 Portable Power Stations and a pair of SolarSaga 100W solar panels to review. Here’s how they fared.
Background and How We Tested
I received one Explorer 1000 Portable Power Station and two SolarSaga 100W solar panels. International delivery was quick and simple, especially considering the size of the gear that was shipped.
They arrived early in the year, but it took quite a while before I was able to do any real testing. I live in Canada, about 1.5 hours outside of Toronto, where winter weather can last from November to April. Although the solar panels can withstand temperatures as low as -10 C/14 F, they need prolonged direct sunlight, which is rare in winter months. I also didn’t want to rest them in the snow while I tested, since they aren’t waterproof.
Ontario is still under various lockdowns and stay-at-home orders as of spring 2021, so all of my testing was completed at home, not at a campsite.
Unpackaging and Getting Started
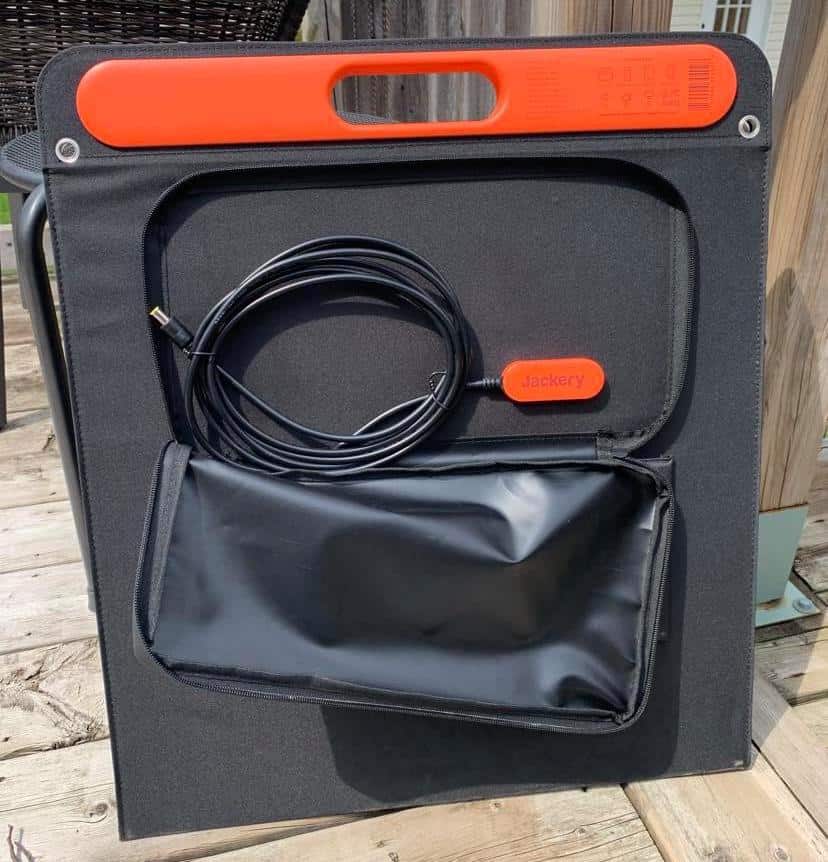
The two solar panels came in their own boxes. Besides some paperwork, it was just one solar panel in each box. The cords were attached directly to the back of each panel inside a zippered pouch, along with two ports for charging small devices directly via USB or USB C.
The panels fold in half for easier storage, with a convenient handle on the top for transport. The handle also has a pair of magnets inside to keep the two halves attached to each other when they’re folded up.
The box for the power station included the following:
- Jackery Explorer 1000 power station
- AC charging cable (two parts)
- Car charger cable
- SolarSaga parallel adapter cable
- Zippered case
Out of the box, the power station came with the battery 40% charged. You need to fully charge it before your first use, so that’s what I did. Using a regular home outlet, the generator drew about 140 watts and got to 100% in around four hours. This is in line with the product specs, which say the unit charges from 0-100% with seven hours of wall outlet power.
It was an easy process, but since it takes a bit of time, you’ll need to make sure you unpackage everything and fully charge the unit in advance rather than waiting until just before you set out on your trip. You can charge the power station via wall outlet, 12v car outlet, electric generator, or solar input.
Using the Jackery Explorer 1000 Portable Power Station
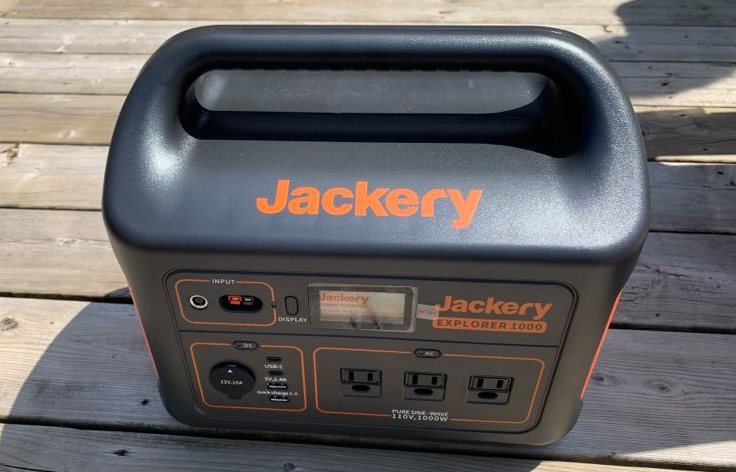
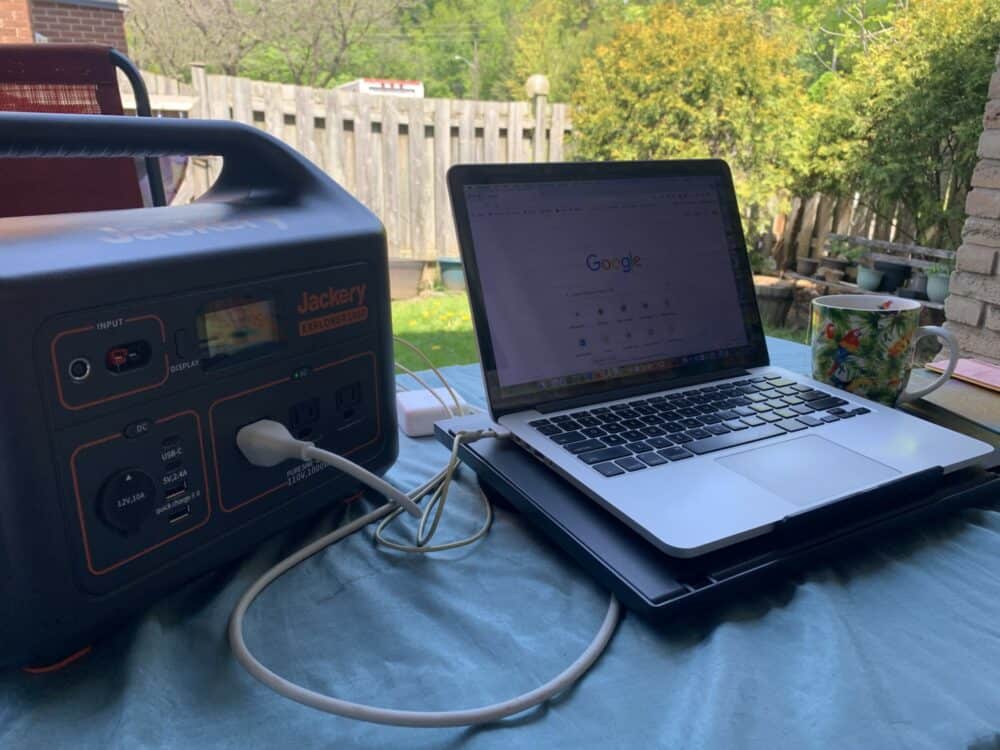
After the power station was fully charged, my next task was draining it again using a range of devices. Since the capacity of the power station is so high (1002Wh), doing this took a surprising amount of time and effort using mobile electronics. In the end I decided to branch out to other electrical gear around my home, and drained the last 35% pretty quickly with a small space heater.
In total, I charged my MacBook five times, my iPhone XR twice, played a 40-inch television for 90 minutes, and ran a space heater for half an hour to drain the power station to empty. Even at 0%, the station’s LED display still lights up to show you that it doesn’t have any power remaining.
The cooling fan on the power station kicked in a few times while charging my laptop but for less than 30 seconds each time. When I ran the space heater (500+ watts), the fan stayed on the entire time. The Explorer 1000 is rated for a sustained output of 1000W and able to surge to 2000W if needed.
For the laptop and phone tests below, I drained the device until it turned off, then charged it again using a standard Apple charger. For each test, I’ve also included the number of watts being put out by the power station.
MacBook charge #1 (48-60 watts)
- Time: 2h 10min
- Power Station battery drain: 100% -> 87% power (-13)
iPhone XR – USB C charging (18-20 watts)
- Time: 90 minutes
- 15 min = 27%
- 30 min = 52%
- 45 min = 72%
- 60 min = 85%
- 90 min = 99%
- Power Station battery drain: 87% -> 85% (-2)
Based on those numbers, I should be able to charge my MacBook 7.7 times (which is in line with the eight laptop charges Jackery claims on its website,) or my iPhone XR at least 50 times. The Jackery website claims 100 charges for an iPhone 8, which has a much smaller battery than the XR.
MacBook charge #2
- Time: 2h 15min
- Power Station battery drain: 85% -> 72% (-13)
MacBook charge #3
- Time: 2h 15 min
- Power Station battery drain: 72% -> 62% (-10)
40″ Television (55 watts)
- Time: 90 minutes
- Power Station battery drain: 62% -> 54% (-8)
MacBook charge #4 and #5, two laptops simultaneously (109-116 watts)
- Power Station battery drain: 54% -> 37% (-17)
iPhone X #2 – USB charging (18-20 watts)
- Time: 2h 20min
- Power Station battery drain: 37% -> 35% (-2)
Mini-Heater (530-565 watts)
- Time: 30 minutes
- Power Station battery drain: 37% -> 0% (-37)
The power station fan kicked in almost right away when using the space heater. The first 27 minutes using the heater saw the battery level drop from 37 to 11%, while the last 11% drained in under three minutes. Using high wattage devices such as heaters or electric grills drained the power quickly, but the power station never got hot on the outside, even when putting out over 500 watts.
I did notice a little power drain when the charging cords were left connected. For example, if my laptop charger was left plugged into the station when it wasn’t charging anything, there was a small output of 3 watts. This can be avoided by pulling cables out when you’re not using them, or by pressing the AC or DC buttons that turn that section of the power station on and off.
There’s also a small flashlight on the side of the station that’s worth mentioning. It used minimal power in my testing, and includes a flash setting for emergencies.

MacBook charging at 59 watts. AC power button (green) is on.
Using Jackery’s SolarSaga 100W Solar Panels
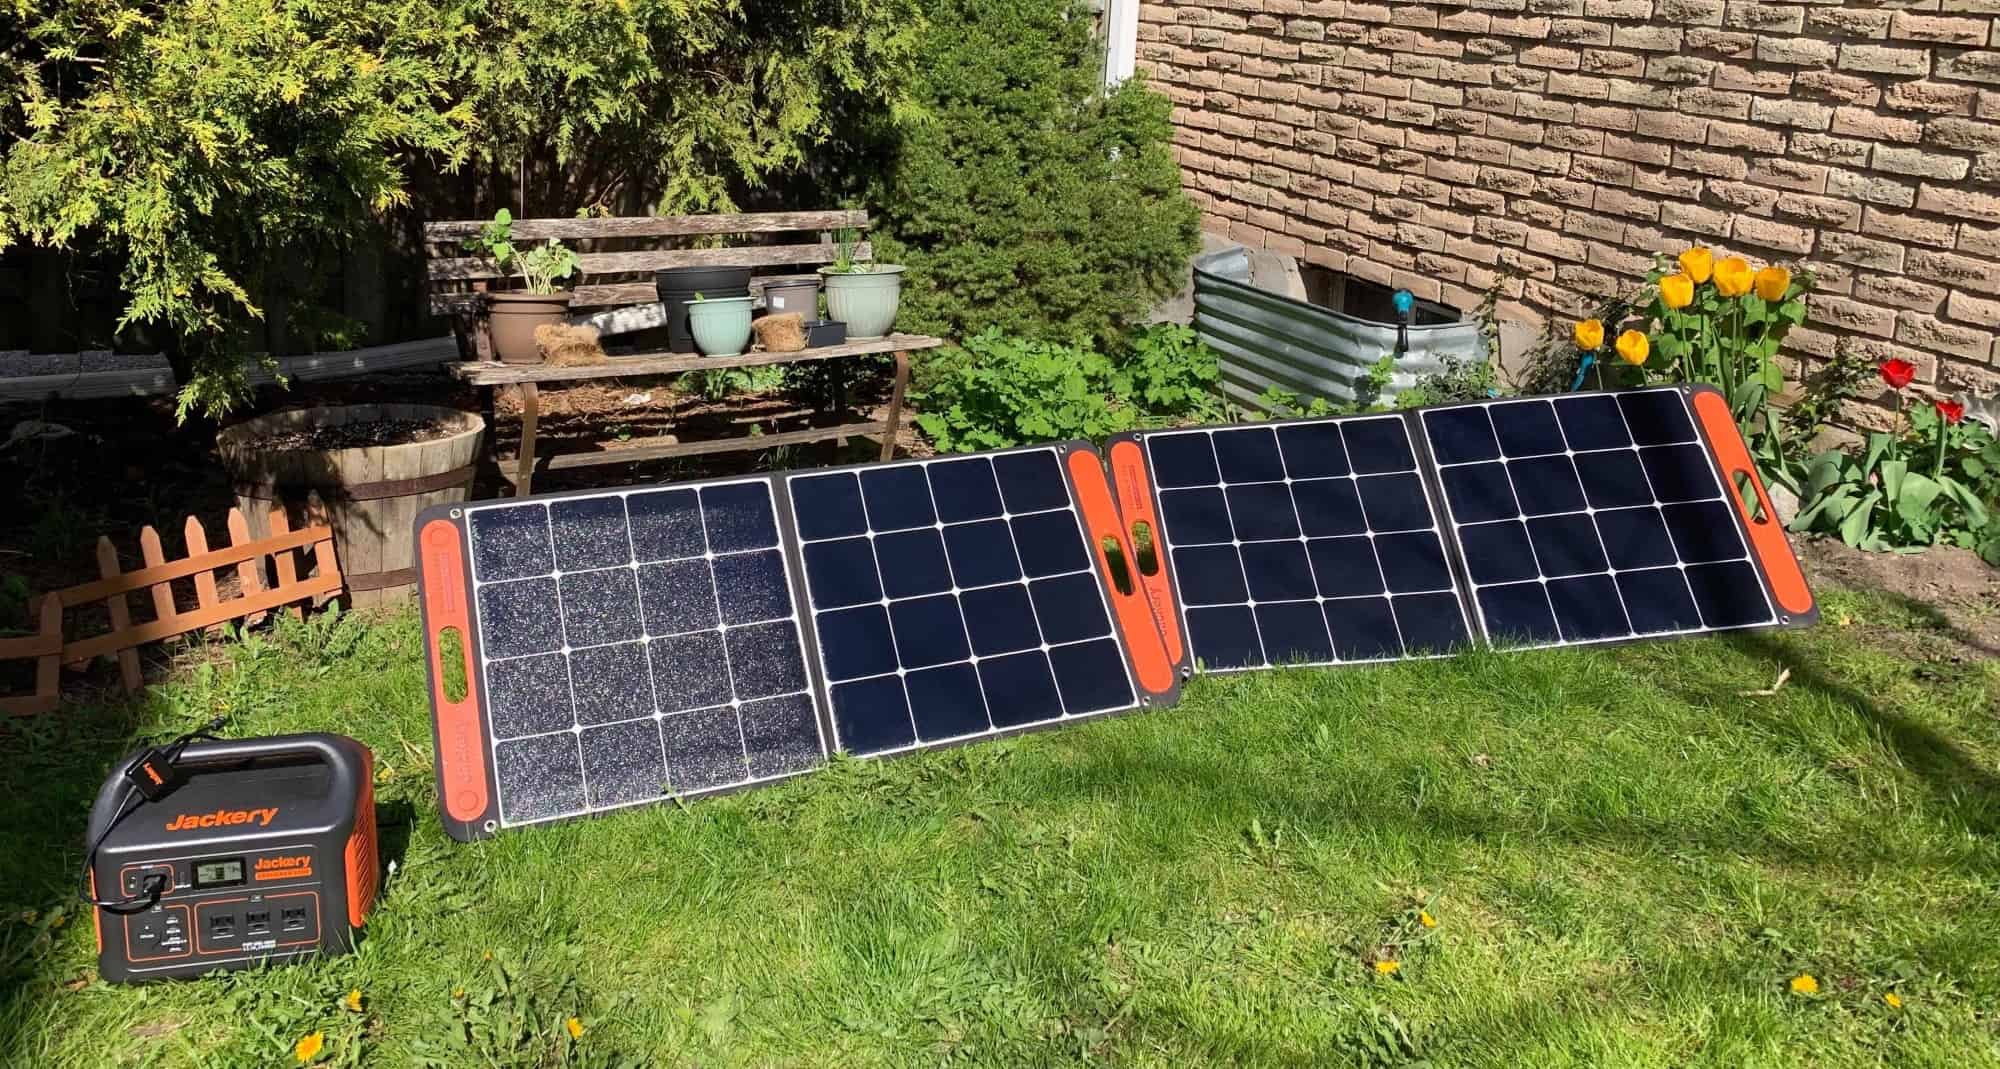
Now that the power station was completely drained, and the sun had come out, I began charging it using the two solar panels. The panels have long inbuilt cords that connect to the power station using the SolarSaga parallel adapter cable.
The length of these cords is helpful, as you need to move the panels around as the sun changes positions. On the back of the panels are two kickstands that detach via velcro.
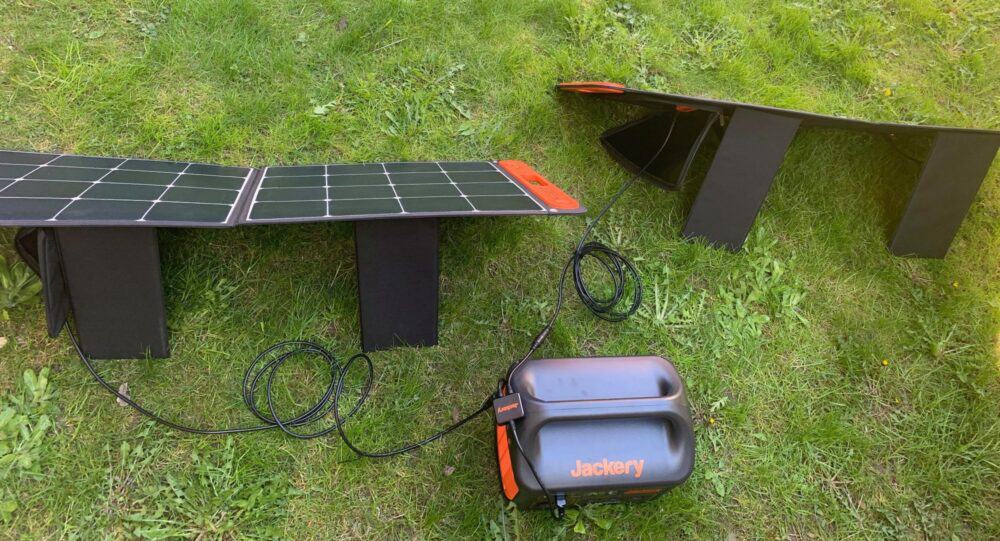
I first opened the solar panels on a clear morning before the sun was in range of my yard. This only brought in 8-10 watts, which wasn’t enough to make any difference charging the station. I did find that the solar panels pulled in enough power to charge small devices directly from their USB ports, though, both under cloud cover and in full sunlight.
When both panels were attached and in direct sunlight, they pulled in about 120 watts of power total. As soon as a cloud passed over, that dropped significantly to 20-40 watts.
In the results below, the power station started at 0% on day 1. The first number is the total charge level, the second is the increase from the previous measurement.
Day 1
- 1 hour = 13% (+13) sunny
- 2 hours = 22% (+9) sunny
- 3 hours = 28% (+6) off and on cloudy
After two hours of sunny weather, clouds passed over off and on, and that dropped charging speeds by roughly half. It became too cloudy (<20 watts) to make a difference in charging, so I called it a day.
Day 2
- 4 hours = 40% (+11) sunny
- 5 hours = 50% (+10) sunny
- 6 hours = 56% (+6) off and on cloudy
- 7 hours = 61% (+5) off and on cloudy
- 8 hours = 72% (+11) sunny
- 9 hours = 82% (+10) partially sunny
- 10 hours = 100% (+18) partially sunny
The last hour of charging was the most mysterious. I didn’t think I had enough daylight left to reach 100%, but the final 18% (at 10-50 watts input) charged in less than an hour in partial sunlight.
Overall, the power station charged from the solar panels in ten hours. The Jackery website claims eight hours, which I believe would be possible in direct sunlight. That said, eight hours of direct sun in a row is unlikely (at least in Canada) in the spring, fall, and winter months, so it may take longer than a day to achieve a full charge.
On the other hand, after five hours of charging, the power station was at 50%, which is still enough power to charge a MacBook four times or an iPhone 25-50 times depending on the device.
Get regular updates from the world of travel tech and remote work
News, reviews, recommendations and more, from here and around the web
Verdict and Final Thoughts
I didn’t get to fully put these devices to use in the great outdoors, but I was able to test their effectiveness from home. I can see the power station solar panel combo being useful in a number of situations, including:
- Car and campervan/RV camping
- Working from your car
- Outdoor events
- Backyard work-from-home situations
- Backyard movie nights
The power station would be perfect for working in your backyard or setting up an outdoor movie night with a portable projector. The power station alone weighs a bit over 20 lbs, so it’s a little heavy to carry from your house to the park, but it should be manageable for most to carry from their car to their campsite.
Overall, I found the unit quite impressive. I enjoyed being able to clearly see on the display screen how much power was coming in or going out, and setup and use were pretty intuitive.
Personally, I think I’ll use the power station a lot more than the solar panels. Part of that is due to the sporadic weather where I live, and I also don’t camp that frequently. I’ve been using the power station to charge devices when working outside, and I used it the other day to charge a laptop in the kitchen when I ran out of nearby outlets. I also plan to keep it fully charged in the car on long journeys, since it’s an ideal companion should an emergency arise.
Once things get back to normal again, I look forward to setting up the solar panels to power speakers and allow people to charge devices at outdoor gatherings with friends and family.
My only real concern with this setup is the price, since the power station/solar panel combo will likely set you back the better part of $1500. For some, that will be a dealbreaker.
It may be a reasonable investment, though, if you’re into survival gear, are an avid camper, or otherwise spend a lot of time outdoors away from the comforts of home. This combo is a simple and practical way of providing power to a wide range of electrical gear when you’re off-grid for days or weeks, including high-drain equipment like CPAP machines and mini-fridges.
Otherwise, it’s a fun and useful device that will certainly come in handy in an emergency or the unlikely event of a zombie apocalypse—just make sure you’ll get enough use out of it to justify the cost!
Note: you’ll get 10% off on the Jackery store with the promo code JADEAL
All images via author